{"navItems":[{"id":"nav-Blog","title":"Blog","section":"Navigation","href":"/blog/"},{"id":"nav-Talks","title":"Talks","section":"Navigation","href":"/talks/"},{"id":"nav-Paths","title":"Paths","section":"Navigation","href":"/path/"},{"id":"nav-Code Snippets","title":"Code Snippets","section":"Navigation","href":"/wiki/snippets/"},{"id":"nav-Glossary","title":"Glossary","section":"Navigation","href":"/wiki/glossary/"},{"id":"nav-Uses","title":"Uses","section":"Navigation","href":"/uses/"}],"allItems":[{"id":"post-are_mobile_devs_still_safe_in_ai_era","title":"Are Mobile Devs Still Safe in the AI era?","section":"Blog Posts","href":"/blog/are_mobile_devs_still_safe_in_ai_era/","keywords":"AI ကြောင့် mobile team တွေ ငယ်လာနေပြီ။ Mobile developer အနေနဲ့ ဘာတွေပြင်ဆင်ထားသင့်လဲ၊ ဘယ်လိုပိုတန်ဖိုးရှိတဲ့သူဖြစ်ရမလဲဆိုတာ ကျွန်တော့်အမြင်ကို ဝေမျှပါတယ်။ thoughts Career Advice","body":"Introduction ဒီကိစ္စက ကျွန်တော့်တစ်ကိုယ်ရည်အမြင်ဖြစ်တဲ့အတွက် ဒီအတိုင်း အမြင်တစ်မျိုးရအောင်ရေးပေးတာပါ ဒီအတိုင်းလို့ လှေနံဓားထစ်မမှတ်ဘဲနဲ့ ကျွန်တော့် view point လို့ပဲ မြင်ပေးပါ Mobile မှာ native သမားတွေနဲ့ cross-platform ရယ်လို့မခွဲဘဲ ခြုံပြောပါမယ်။ Safe ဖြစ်လားဆိုတော့ မဖြစ်ပါဘူး။ ဘာလို့လဲဆိုတော့ လက်ရှိ claude model တွေကတင် တော်တော်လေး capable ဖြစ်နေပြီး ကောင်းကောင်းခိုင်းတတ်ရင် လူကဝင်ပြင်ခိုင်းရတဲ့နေရာတော်တော်နည်းပါတယ် project ရဲ့ context ကို grasp လုပ်တာမှာလည်း တိကျသေချာပြီး skill တွေပေးထားရင် ကောင်းကောင်းကြီးအလုပ်လုပ်နိုင်ပါတယ်။ Do we still need App? နောက်တစ်ချက်ကလည်း app တွေမလိုတော့ဘူး AI ကို တိုက်ရိုက်ခေါ်ပြီးလုပ်ခိုင်းလို့ရတယ်ဆိုတာ မှန်သင့်သလောက်တော့မှန်တယ် ဥပမာ အရင်က background ဖျောက်တာတို့ နောက်ကလူဖျောက်တာတို့ကို app သုံးရပေမယ့် အခု Ai ကို chat interface ကနေပဲခိုင်းလို့ရတာမျိုး နောက်တစ်ခါ စာအုပ်တွေမဖတ်နိုင်လို့ summarise လုပ်တာကို app တွေသုံးရပေမယ့် အခု AI က same chat interface ကနေပဲ conversation နဲ့ အဲ့လိုကိစ္စတွေကိုတစ်နေရာတည်းလုပ်နိုင်တော့ app တွေလိုမှာမဟုတ်တော့ဘူးဆိုတဲ့အယူအဆက မှန်သယောင်ရှိတယ် ဒါပေမယ့် ကုမ္ပဏီအပေါ်လည်းမူတည်သေးတယ် ကိုယ့်ကုမ္ပဏီက ပစ္စည်းတွေကို mobile app ကနေ တင်ရောင်းနေတာမျိုး ဒါမှမဟုတ် social media platform လုပ်နေတာ ဒါမှမဟုတ်လဲ mobile wallet လုပ်နေတာ ဒီလိုမျိုး ကိုယ့်ရဲ့ physical service ကိုမှ digital နည်းပညာသုံးပြီး enahnce လုပ်နေတာမျိုးဆို app ကတော့ လိုနေဦးမှာပဲလို့မြင်တယ် အဲ့တော့ mobile app လိုတာကတစ်ပိုင်း အဲ့ app အတွက် developer တွေဘယ်လောက်လိုမလဲကတစ်ပိုင်းပေါ့ developer တွေအရင်ကလောက်မလိုတော့မှာကတော့ အသေအချာပဲ senior+ level (ပြောချင်တာက IC ဘက်ကိုခြေတစ်လှမ်းလှမ်းနေတဲ့သူမျိုး) တစ်ယောက်လောက်နဲ့ကို drive လို့ရနေတဲ့ပုံစံလို့မြင်တယ် debatable တော့ဖြစ်မှာပေါ့ feature တွေရဲ့ complexity ဖြစ်တာအပေါ်မူတည်ပြီး လူပိုလိုတာလည်းဖြစ်နိုင်တာကိုး ဒါပေမယ့် မြင်ယောင်ကြည့်လို့ရတယ် အရင်က ငါးယောက်လိုရင် အခုနှစ်ယောက်သုံးယောက်လောက်နဲ့သွားလို့ရတယ် What can we do ပြောချင်တာက အဲ့လိုအခြေအနေမှာ တင်ကျန်အောင် ဘာလုပ်ရမလဲပေါ့ ကျွန်တော့်အမြင်ကိုပြောတာနော် ဟိုဘက်က ပိုက်ဆံမတတ်နိုင်လို့ ဘတ်ဂျက်လျှော့မယ် တစ်ခြားနေရာပိုသုံးမယ်ဆို ပြုတ်မှာပဲ ဒါပေမယ့် ကိုယ်ဘာလုပ်နိုင်လဲပေါ့ ပထမတစ်ချက် ကျွန်တော်မြင်တာ mobile က consumer facing product ဖြစ်တဲ့အတွက် product oriented ဖြစ်ဖို့လိုတယ်။ ဒီ UI ရေးဆို မြန်မြန်ပြီးအောင်ရေးလိုက်တာပဲဆိုတာမျိုးက သိပ်အလုပ်မဖြစ်ဘူး ကိုယ် commit လုပ်ထားတဲ့ target date အတိုင်း မှန်မှန် deliver လုပ်နေရမှာပေမယ့် ဒါပေး ဒါလုပ် ဘာမှမစဥ်းစားတာမျိုးကို ကျွန်တော်သိပ်မကြိုက်ဘူး UI ပေးလိုက်ပြီ ဒီ feature က ဘာလုပ်ချင်တာလဲ ဘာကြောင့်လိုတာလဲ ဒီကောင်ကနေ bussiness ကို revenue ကို ဘယ်လို drive မှာလဲ ဒါတွေကိုစဥ်းစားသင့်တယ် အကြံပေးစရာရှိရင်ပေးသင့်တယ် ဥပမာ native experience မဟုတ်တဲ့ flow လာရင် ဒါလေးကတော့ ဒီလိုဆို သက်ဆိုင်ရာ platform ရဲ့ look & feel နဲ့ consistent ပိုဖြစ်တယ် ဒါလေးကတော့ app တော်တော်များများမှာ ဒီလိုလုပ်ကြတယ် စသဖြင့် feedback ပေးနိုင်ရင် ကိုယ့်ကုမ္ပဏီအပေါ်လည်းမူတည်ပေမယ့် healthy ဖြစ်တဲ့ cutlure တွေကတော့ အမြဲ welcome ဖြစ်တယ်လို့ကျွန်တော်ထင်တယ် နောက်တစ်ချက်က release plan ကိုယ်က feature တစ်ခုလုပ်လိုက်ပြီ လူဆိုတာ အမှားမကင်းဘူး ဒီ feature ကို monitor လုပ်နေရမယ် ဒီကောင်ကို release လုပ်လိုက်လို့ crash spike တွေတက်လာတာ တစ်ချို့နေရာတွေမှာ user interaction ကျနေ"},{"id":"post-are_mobile_devs_still_safe_in_ai_era_en","title":"Are Mobile Devs Still Safe in the AI era?","section":"Blog Posts","href":"/blog/are_mobile_devs_still_safe_in_ai_era_en/","keywords":"AI is shrinking mobile teams. My honest take on whether mobile developers are still safe in 2026, and the practical moves that keep you indispensable. thoughts Career Advice","body":"Introduction Look, this is just my personal take on things, but I wanted to throw a different perspective out there. Try to look at it from my point of view for a second without jumping to conclusions. To be completely honest—whether we’re talking native or cross-platform—nobody is safe right now. The latest Claude models are incredibly capable. If you know how to feed them the right project context and actually have the engineering skills to guide them, you rarely have to step in and fix the code yourself. If you know what you're doing, you can ship high-quality work incredibly fast. Do We Even Need Apps Anymore? The reality is that for a lot of things, we just don't need standalone apps anymore. People are starting to bypass apps entirely and just talk to AI. Before: You’d download a specific app just to erase a background or crop someone out of a photo. Now: You just ask a chatbot to do it. Before: You used apps to summarize long articles or books. Now: You just dump the text into an LLM and get the summary instantly in one place. So when people say the app ecosystem is dying, they aren't totally wrong. But it really depends on the business. If your company sells physical products, runs a social network, handles mobile wallets, or uses digital tech to back up a real-world service, you obviously still need an app. But here’s the real kicker: even if the _need_ for an app is still there, how many developers do you actually need to build it? That’s where the real hit is coming. Teams are shrinking. I can easily see a modern mobile project being driven by just one solid Senior+ or Individual Contributor (IC) level engineer. Sure, if the features are incredibly complex, you might need a couple more bodies. But where it used to take a team of five, you can now easily get away with two or three people. How Do We Survive This? So, what’s the playbook for staying relevant? Here is my take on how to protect yourself. If a company runs out of money, they’re going to slash the budget—that’s life. But at the very least, what can you do to make yourself indispensable? Think Like a Product Person, Not a Code Monkey Mobile is a consumer-facing world. You have to be product-oriented. Just throwing a UI together from a Figma file and calling it a day isn't going to cut it anymore. Meeting deadlines is the bare minimum, but blindly executing tickets will get you replaced. When a new feature comes your way, you need to think: _What are we actually trying to achieve here?_ _Why do our users care?_ _How is this going to move the needle for the business or make us money?_ Bring your engineering brain to the product discussions. If a design feels clunky or goes against native platform habits, speak up and offer a better alternative. Healthy feedback is almost always appreciated by management. Own the Release and Post-Launch Strategy AI can write a feature, but it’s not going to manage your rollout or monitor your app’s health unless you explicitly tell it"},{"id":"post-books_recommendations_for_software_engineers","title":"Software Engineer တွေ ဖတ်သင့်တဲ့ စာအုပ်များ","section":"Blog Posts","href":"/blog/books_recommendations_for_software_engineers/","keywords":"ကျွန်တော်ဖတ်ခဲ့တဲ့ ဖတ်နေတဲ့ စာအုပ်တွေကို ညွှန်ပေးထားပါတယ်။ thoughts books_recommendation Learning Resources","body":"အောက်မှာဆက်ပြောမယ့်စာအုပ်တွေက အနည်းဆုံး work experience 2 ~ 3 years ရှိမှပိုအဆင်ပြေပါလိမ့်မယ် ဒါမှမဟုတ် ကိုယ်ကနောက်တစ်ဆင့်ကို ထပ်တက်ချင်တာ ပိုပြီးနားလည်တတ်ကျွမ်းချင်တာ ဆိုတဲ့သူတွေအတွက် ညွှန်းချင်တာပါ software engineer တစ်ယောက်အနေနဲ့ ဖတ်သင့်တဲ့စာအုပ်တွေဖြစ်လို့ framwork တစ်ခု language တစ်ခုကို သင်ပေးတဲ့စာအုပ်တွေတော့မဟုတ်ဘူးပေါ့ဗျာ တစ်ချို့ဟာတွေတော့ စာဖတ်ရတာ နည်းနည်း လေး တယ်။ Dependency Injection: Principles, Practices, and Patterns by Mark Seemann and Steven van Deursen DI နဲ့အစချီထားပေမယ့် DI အပြင် cross cutting concerns တွေထည့်တာ aspect oriented programming, domain driven design, common DI patterns, anti patterns တွေနဲ့ software တစ်ခုရဲ့ dependency graph ကဘယ်လိုရှိသင့်တယ်ဆိုတာကို အတွေးပွားစေတဲ့စာအုပ်ပါ။ CdotNet ကိုအခြေခံပြီးရေးထားပေမယ့် ရှေ့အပိုင်းတွေက တော်တော်လေး generic ဖြစ်တော့ ကျွန်တော်ကတော့ framework အကြောင်းရှင်းတာတွေကိုကျော်ပြီး ကျွန်တော်လိုချင်တာကိုဖတ်ပါတယ်။ Domain-Driven Design by Eric Evans တော်တော်လေးကြာနေပြီဖြစ်တဲ့စာအုပ်ပါ ဒါပေမယ့် အခုထိ DDD အတွေးအခေါ်တော်တော်များများက အသုံးဝင်နေဆဲပါပဲ သုံးတဲ့ language အပေါ်မူတည်ပြီး ပိုလို့တောင် concise ဖြစ်သွားပါသေးတယ်။ ဒီစာအုပ်ရဲ့အဓိကရည်ရွယ်ချက်က complex ဖြစ်တဲ့ business logics တွေ requirements တွေကနေ domain object တွေ communication pattern တွေကို မြန်မြန်ဆန်ဆန် spot လုပ်နိုင်အောင် အတွေးအခေါ်ကို train ပေးတဲ့သဘောပါ။ Theory ပိုင်းတွေနဲ့ သူတို့ခေတ်က challenges တွေကို ရှင်းပြထားတာဆိုတော့ ကျွန်တော့်အတွက်တော့ ဖတ်ရတာနည်းနည်းလေးခဲ့ပေမယ့် system design round တွေမှာရော လက်တွေ့လုပ်ငန်းခွင်မှာပါ ပိုပြီးမြင်တတ် တွေးတတ်လာတဲ့အတွက် အကျိုးရှိမယ်ထင်ပါတယ်။ Implementing Domain-Driven Design by Vaughn Vernon အပေါ်ကစာအုပ်ကိုဖတ်ပြီးပြီဆိုရင်တော့ တစ်ဆက်တည်းဒီစာအုပ်ကို ပူပူနွေးနွေးဆက်ဖတ်သင့်ပါတယ်။ အပေါ်ကစာအုပ်ထဲကမရှင်းတာတွေ ဒီမှာရှင်းသွားပါမယ်။ မျက်စိထဲမမြင်တာတွေ ပိုမြင်လာပါမယ်။ နှစ်အုပ်ကို တစ်ဆက်တည်းဖတ်ရင် အာဘော်နှစ်ခုကိုယှဥ်ထိုးကြည့်ပြီး ပိုပြီးဆက်စပ်မိသွားပါလိမ့်မယ်။ Test Driven Development: By Example by Kent Beck TDD ကိုကြိုက်တဲ့သူလဲရှိသလို မကြိုက်တဲ့သူလည်းရှိတယ်ပေါ့။ ကျွန်တော်ကတော့ personally က behavioiural driven (BDD) ကိုပိုသဘောကျပါတယ်။ ဘယ်လိုပဲဖြစ်ဖြစ် TDD တစ်ခုတည်းမဟုတ်ဘဲ software testing နဲ့ပတ်သက်တဲ့ အယူအဆ သဘောတရား ချဥ်းကပ်ပုံတွေကို အများကြီးနားလည်သွားပါလိမ့်မယ်။ Extreme Programming Explained by Kent Beck TDD ဆိုတာ တစ်ကယ်တော့ extreme programming ကနေပေါ်လာတဲ့အရာတစ်ခုပါ။ အခု agile တို့ CI/CD တို့ဆိုတာလည်း XP ကနေဖြစ်လာတာတွေပါ။ TDD ကိုဖတ်ပြီးရင်တော့ XP အကြောင်းလေးလည်း နည်းနည်းမြည်းစမ်းကြည့်သင့်ပါတယ်။ ချက်ချင်းကြီး အကျိုးမရှိရင်တောင် တရေးရေးနဲ့ အဲ့စာအုပ်ထဲကအကြောင်းတွေ ခေါင်းထဲပေါ်လာတဲ့အခိုက်အတန့်တွေ ရှိလာပါလိမ့်မယ်။ Working Effectively with Legacy Code by Michael C. Feathers ကိုယ့်ရဲ့ လက်ရှိ knowledge ကနေ scale up ဖြစ်ချင်တဲ့သူတိုင်း ဖတ်ကိုဖတ်သင့်တဲ့စာအုပ်ပါ။ ကျွန်တော်တို့က နေ့စဥ် change request တွေ သူများ project တွေနဲ့ လုံးပန်းနေရတာမို့ code ပြင်တာ feature အသစ်ထည့်တာကို ဘယ်လို strategy နဲ့သွားရမလဲ unit test တွေကိုဘယ်လို leverage လုပ်ရမလဲ အများကြီးလေ့လာစရာတွေရှိပါတယ်။ Good code ဆိုတာဘာလဲ ဘယ်လို code မျိုးက ပြောင်းလွယ်ပြင်လွယ်တာလဲဆိုတာကို ပိုပြီးမြင်သာလာအောင် ဒီစာအုပ်ကိုဖတ်သင့်ပါတယ်။ ကဲ high-level, sy"},{"id":"post-books_recommendations_for_software_engineers_en","title":"My Recommended Books for Software Engineers","section":"Blog Posts","href":"/blog/books_recommendations_for_software_engineers_en/","keywords":"A hand-picked reading list for engineers with 2+ years of experience — covering dependency injection, DDD, TDD, legacy code, and operating systems. thoughts books_recommendation Learning Resources","body":"The books I’m about to list are best suited for folks with at least 2 to 3 years of work experience, or for anyone who feels ready to level up and gain a deeper mastery of software engineering. Since these are geared toward foundational engineering principles, you won't find books here that teach a specific framework or language. Just a heads-up: some of these can be quite a heavy read. Dependency Injection: Principles, Practices, and Patterns by Mark Seemann and Steven van Deursen Even though it starts out with Dependency Injection (DI), this book goes way beyond that. It really expands your thinking on how a software application's dependency graph should look, diving into cross-cutting concerns, Aspect-Oriented Programming (AOP), Domain-Driven Design (DDD), common DI patterns, and anti-patterns. While the examples are written using Cand .NET, the foundational concepts are highly generic. Personally, I just skipped the framework-specific explanations and focused on extracting the core architectural concepts I needed. Domain-Driven Design by Eric Evans This is a classic that has been around for a while, but most of its core philosophies are still incredibly relevant today. Depending on the language you use, applying these concepts can actually become even more concise now. The main goal of this book is to train your mindset so you can quickly spot domain objects and communication patterns out of complex business logic and requirements. Because it delves into a lot of theory and the specific challenges of its era, I found it a bit heavy to read. However, it’s incredibly rewarding—it vastly improves how you analyze and approach system design rounds and real-world production setups. Implementing Domain-Driven Design by Vaughn Vernon Once you finish Evans' book, you should jump straight into this one while the concepts are still fresh in your mind. This book does a great job of clarifying the things that might have felt abstract or confusing in the original DDD book. It brings the concepts into view and makes them highly actionable. Reading these two back-to-back lets you compare both perspectives, making it much easier to connect the dots. Test Driven Development: By Example by Kent Beck TDD is definitely a polarizing topic—some devs love it, some hate it. Personally, I lean more toward Behaviour-Driven Development (BDD). Regardless of where you stand, this book is worth reading because it gives you a deep understanding of software testing philosophies, concepts, and approaches that go far beyond just writing unit tests. Extreme Programming Explained by Kent Beck TDD actually originated from the Extreme Programming (XP) movement. In fact, a lot of what we call Agile and CI/CD today evolved out of XP practices. After reading about TDD, it’s highly worth getting a taste of what XP is all about. Even if you don't see immediate practical benefits, you’ll find yourself having \"aha!\" moments later in your career where the concepts from this book "},{"id":"post-Everything I've seen so far about Apple's Foundation Models Framework","title":"Everything I've seen so far about Foundation Models","section":"Blog Posts","href":"/blog/Everything I've seen so far about Apple's Foundation Models Framework/","keywords":"A hands-on tour of Apple's Foundation Models: on-device LLMs, why they matter, streaming, structured output, and the new agentic primitives from WWDC26. apple_intelligence foundation_models on_device_llm llm large_language_model agentic_workflow WWDC26 WWDC26","body":"Introduction Confession time! I slept on Apple's Foundation Models when it first dropped. I was deep in outsource client works at the time, and there's basically an unwritten law in that world, if it doesn't run on iOS, Android, and the web, it doesn't exist. Foundation Models is strictly Apple-only, or, specifically Apple Silicon-only. So I filed it under _\"not my problem right now\"_ and moved on. Then WWDC26 happened, and suddenly Foundation Models tweets are everywhere. That felt like a signal. And this year's announcements made it even harder to ignore — Apple open-sourced the Foundation Models framework at WWDC26, which means we can interact with LLMs on anywhere Swift runs, including Linux servers. Cloud model providers like Google Gemini and Anthropic Claude are announcing their official support for Foundation Models framework, that is, you can interact with their models natively just like you would interact with Apple's on-device AI models. Even more, they shipped a set of new primitives specifically designed for building agentic experiences: native system tools, dynamic instructions, dynamic profiles, and many open source packages. It's no longer just a \"make my text field smarter\" API. It's a full toolkit for building AI agents beyond on device, that can reason, act, and course-correct. So I finally sat down, rolled up my sleeves, and started digging. This article is my guided tour of what I found __so far__, starting from \"why does on-device AI even matter?\" all the way to tools, streaming, structured output and what not. Let's go. What is an On-Device LLM? When you think of ChatGPT or Claude, you're thinking of cloud-based models. These are massive, often hundreds of billions of parameters, and they need entire server farms of power-hungry GPUs to run. Every time you send a prompt, your text leaves your device, travels across the internet to a data centre, gets processed, and the response bounces back to you. An on-device LLM skips all of that. The model lives directly in the silicon of the user's device, their iPhone, iPad, or Mac, and runs entirely locally. No round-trips. No servers. But there's an obvious catch 🤔, you can't just squeeze a 100-billion-parameter model onto an iPhone of should you? It would crash from memory exhaustion instantly and drain the battery in minutes. Think of parameters as millions of tiny, adjustable dials inside a giant mathematical formula. More dials -> smarter model -> more memory required. Apple's answer is quantisation, compressing those dials from 32-bit floats down to 4-bit integers. This shrinks a 3-billion-parameter model to roughly 1.5–1.8 GB, small enough to sit comfortably alongside your running app in Unified Memory, and fast enough to be handled by the Apple Silicon Neural Engine (NPU) in near-real-time. I know those are such a mouthful words, I also learned it from the Google so feel free to skip them unless you are into... you know those kind of stuffs. Why do you want an On-Device LLM?"},{"id":"post-lets_talk_about_backtracking","title":"Let’s talk about Backtracking","section":"Blog Posts","href":"/blog/lets_talk_about_backtracking/","keywords":"Backtracking အကြောင့် လေ့လာကြရအောင် dsa recursion swift Data Structure Backtracking","body":"Introduction Backtracking ဆိုတာ recursive call တွေမှာ မသိမဖြစ်သိထားရမယ့် အကြောင်းအရာတစ်ခုပါ။ Backtracking သဘောကိုနားလည်ရင် tree/graph/dp သုံးရတဲ့ အဆင့်မြင့် algorithms တော်တော်များများကို နားလည်အသုံးပြုနိုင်ပါလိမ့်မယ်။ အနည်းဆုံးတော့ ဘယ်လိုအသုံးချရမလဲဆိုတဲ့ idea တော့ အနည်းနဲ့အများ ရလာမယ်ထင်ပါတယ်။ Prerequisite Recursion Why should you care about backtracking? Backtracking ဆိုတာက brute force ကိုမှ ပိုပြီး efficient ဖြစ်တဲ့ brute force လို့ပြောလို့ရပါတယ်။ ပုစ္ဆာတစ်ခုမှာ ဖြစ်နိုင်ခြေတွေအားလုံးကို strategically စဥ်းစားပြီးအဖြေထုတ်သွားတာမျိုးပါ။ နောက်ဆက်ပြောမယ် article တွေကို လိုက်လုပ်နိုင်ဖို့ဆိုရင် backtracking သိဖို့လိုပါတယ်။ ရှေ့ recursion article မှာပြောခဲ့ပြီးသားအကြောင်းအရာတွေကို နားလည်ထားမှ backtracking ကို လိုက်လုပ်နိုင်ပါလိမ့်မယ်။ Backtracking in Action ထုံးစံအတိုင်း ပုစ္ဆာလေးတစ်ပုဒ်နဲ့အရင် စကြည့်လိုက်ရအောင်။ https://www.geeksforgeeks.org/problems/power-set4302/1 Given a string S, find all the possible subsequences of the String in lexicographically-sorted order. ဒါက ပုစ္ဆာမှာ အရေးကြီးတဲ့အချက်တွေကို bold လုပ်ပြထားတာပါ။ Subsequence ဆိုတဲ့သဘောက same order ဖြစ်ရပါမယ်။ ဆိုကြပါစို့။ String “abc” မှာ “ac” ဆိုတာက subsequence ဖြစ်ပါတယ်။ ဒါပေမယ့် “ca” ဆိုရင်တော့ subsequence မဟုတ်ပါဘူး။ Original string မှာပါတဲ့ order စဥ်အတိုင်းမဟုတ်လို့ပါ။ Subarray ဆိုတာရှိပါသေးတယ်။ Subarray ဆိုရင်တော့ contiguous ဖြစ်ရပါမယ်။ ဥပမာ “ab” ဆိုရင် subsequence လည်းဟုတ်တယ် subarray လည်းဟုတ်တယ်။ ဒါပေမယ့် “ac” ဆိုရင်တော့ subsequence ဟုတ်ပေမယ့် subarray မဟုတ်တော့ပါဘူး ကြားထဲက “b” မပါလာလို့ပါ။ ဒါလေးက အပိုအနေနဲ့ပြောပြတာပါ။ သူဥပမာပေးထားတဲ့ input/output ကို ကြည့်ရအောင်ပါ။ တစ်ကယ်လို့ string S က “abc” လို့ပေးလာခဲ့ရင် output က [“a”, “ab”, “abc”, “ac”, “b”, “bc”, “c”] ဆိုပြီးထွက်ပါမယ်။ ဒီလိုပုစ္ဆာမျိုးကို powerset ပုစ္ဆာလို့ခေါ်ပါတယ်။ Powerset ကို formally define လုပ်မယ်ဆိုရင် A power set is the set of all possible subsets of a given set, including the empty set and the set itself. For a set with 𝑛 elements, its power set will contain 2^n subsets. ဥပမာ string “ab” ကို {“a”, “b”} အနေနဲ့မြင်ကြည့်မယ်ဆိုရင် သူ့ရဲ့ powerset က 2² ဆိုတော့ 4 ခုထွက်မှာပါ။ ဘာကြောင့်လဲဆိုတော့ powerset မှာ empty set ရှိတာကိုး။ မြင်သာအောင်ပြရရင် ဒီလိုပေါ့။ အဲ့တော့ ကျွန်တော်တို့ သူ့ဥပမာအတိုင်းစဥ်းစားမယ်ဆိုရင် “abc” ဆိုတော့ တစ်ကယ်က 2³ ဖြစ်ပြီး 8 ခုထွက်ရမှာပေါ့။ ဒါပေမယ့် သူက empty set “” ကို မယူတော့ 2³ - 1 ဖြစ်ပြီး 7 ခုထွက်လာတာဖြစ်ပါတယ်။ ဒါဆိုရင် ကျွန်တော်တို့ powerset သဘောတရားအတိုင်း empty set ကိုပါယူပြီး စဥ်းစားကြည့်ရအောင်။ “ab” နဲ့စစဥ်းစားကြည့်မယ်။ လွယ်အောင်လို့။ အဲ့တော့ စစချင်းက empty “” ဖြစ်နေမယ်။ အဲ့ကနေမှ possible ways က နှစ်ခုထွက်တယ်။ ပထမတစ်ခုက string “ab” ထဲက ပထမကောင်ဖြစ်တဲ့ “a” ကို ယူပြီး ခုနက empty “” နဲ့ပေါင်းလို့ရတယ် ဒါက ပထမ ဖြစ်နိုင်ချေ။ ဒုတိယက “a” ကိုမယူဘဲ လက်ရှိ ရှိပြီးသား empty “” အတိုင်းပဲထားလို့လည်းရတယ်။ Empty ကို မြင်သာအောင် “_” နဲ့ပြပါမယ်။ ဒီ ဖြစ်နိုင်တဲ့ နည်းလမ်းနှစ်ခုကိုအခြေတည်ပြီးတော့ decision tree တစ်ခု ဆွဲကြည့်ရအောင်။ Empty string “” ကနေ ပထမ possibility ဖြစ်တဲ့ “_” ကို “a” နဲ့ပေါင်းပြီး “a” ထွက်တာရယ် ဒုတိယ possiblity ဖြစ်တဲ့ ရှိပြီးသား “_” အတိုင်းထားတာရယ်ကို အရင်ကြည့်ပါမယ်။ ဆိုတော့ ကျွန်တော်တို့"},{"id":"post-lets_talk_about_backtracking_en","title":"Let’s talk about Backtracking","section":"Blog Posts","href":"/blog/lets_talk_about_backtracking_en/","keywords":"Backtracking is smarter brute force. Learn how to explore every valid solution with recursive pruning in Swift, starting with power sets and decision trees. dsa recursion swift Data Structure Backtracking","body":"Introduction Backtracking is something you absolutely need to understand when working with recursive calls. Once you grasp the concept, you'll be able to understand and apply a wide range of advanced algorithms that involve trees, graphs, and dynamic programming. At the very least, you'll come away with a solid idea of when and how to use it. Prerequisite Recursion Why should you care about backtracking? You can think of backtracking as a smarter version of brute force. Instead of blindly trying every possibility, it strategically explores all potential solutions to a problem. You'll need to understand backtracking to follow along with the articles coming up next. Make sure you're comfortable with everything covered in the recursion article before diving into this one. Backtracking in Action As usual, let's start with a problem. https://www.geeksforgeeks.org/problems/power-set4302/1 Given a string S, find all the possible subsequences of the String in lexicographically-sorted order. The key terms in this problem are bolded. A subsequence must preserve the original order of characters. For example, is a valid subsequence of , but is not — because the order doesn't match the original string. There's also the concept of a subarray, which must be contiguous. For instance, is both a subsequence and a subarray, but is only a subsequence — not a subarray — because is missing in between. That's just a side note for extra context. Let's look at the example input/output. If the input string is , the expected output is . This type of problem is called a powerset problem. Formally defined: A power set is the set of all possible subsets of a given set, including the empty set and the set itself. For a set with 𝑛 elements, its power set will contain 2^n subsets. For example, if we treat the string as the set , its power set has 2² = 4 elements, because the power set includes the empty set. Visually: So for , there should technically be 2³ = 8 subsets. But since the problem excludes the empty string , we get 2³ - 1 = 7. Let's work through it including the empty set for clarity. We'll start with to keep things simple. Initially, we have an empty string . From there, two choices arise: we can either include the first character (appending it to to get ), or skip it and keep as is. We'll use to represent the empty string visually. Let's draw out the decision tree based on these two choices — either include or don't: We've processed . Now only remains. From each of the two leaf nodes and , we again branch: include or skip it. Starting from the leftmost node : That covers the branch. Now for : All characters have been used, so we can't go further. The possible subsequences are , , , and . Excluding the empty string leaves us with three. Now let's extend this to and fill out the full decision tree: Let's quickly walk through from left to right. Leaf + = , skip = Leaf + = , skip = Leaf + = , skip = Leaf + = , skip = Since there are no mor"},{"id":"post-lets_talk_about_recursion","title":"Let’s talk about Recursion","section":"Blog Posts","href":"/blog/lets_talk_about_recursion/","keywords":"Recursion ကို base case, call stack, Tower of Hanoi ဥပမာတွေနဲ့ Swift code ကိုသုံးပြီး scratch ကနေ ရှင်းပြပေးထားပါတယ်။ dsa recursion swift Data Structure Backtracking","body":"Introduction Recursion ကို မသိတဲ့သူတော့မရှိလောက်ပါဘူး။ ကျွန်တော် programming စလုပ်တုန်းက recursion သဘောတရားကို နားမလည်ခဲ့ဘူး recrusive call မြင်ရင်ကို ကြောက်တယ်ပေါ့နော်။ နောက်တော့မှ တော်တော်လေးအချိန်ယူပြီး မျက်လုံးထဲမြင်လာအောင် လေ့ကျင့်ယူရတာပေါ့။ နောက်လူတွေ ကျွန်တော့်လိုမဖြစ်အောင် recursion အကြောင်း တတ်နိုင်သလောက် အလွယ်ဆုံးဖြစ်အောင် ရှင်းပြပေးထားပါတယ်။ What is recursion? Function တစ်ခုက ကိုယ့်ကိုယ်ကိုပြန်ခေါ်လိုက်ရင် recursion ဖြစ်ပါတယ်။ ပြောရရင်တော့ ဒီလိုပေါ့ဗျာ အဲ့လို foo ဆိုတဲ့ function က ကိုယ့်ကိုယ်ကိုပြန်ခေါ်တော့ဘာဖြစ်သလဲဆိုတော့ print ထုတ်ထားတဲ့စာကြောင်းတွေ အဆက်မပြတ်ထွက်လာတာပေါ့။ Recursion မသုံးဘဲ အဆက်မပြတ်ထွက်အောင် ဘာလုပ်လို့ရလဲဆိုတော့ while နဲ့ loop ပတ်ရင်လည်း ထွက်တာပါ။ အဆက်မပြတ်မထုတ်ချင်ဘူး ၁ ကနေ ၅ ထိ အစဥ်လိုက်ထုတ်ချင်တယ်ဆိုပါစို့။ ဒါဆိုရင် for loop ကိုသုံးလို့ရတယ်။ While နဲ့လဲရပေမယ့်လို့ ဒီနေရာမှာ for နဲ့ပဲရေးပြပေးလိုက်ပါတယ်။ အဲ့တာဆိုရင် loop ပတ်တဲ့ code တိုင်းကို recursion နဲ့အစားထိုးလို့ရတယ်လို့ နားလည်လို့ရပါတယ်။ အပေါ်က for loop ကို recursion နဲ့ ရေးကြည့်ရအောင်ပါ။ !Recursion အပေါ်က code ကိုကြည့်ပြီး နာလည်ရခက်သွားလား? အဲ့တာဆိုရင်တော့ ဆက်ပြောမယ့်အပိုင်းကို သေသေချာချာလေး နားလည်အောင်အချိန်ယူပြီးသေချာဖတ်ပါ။ Function တွေကို execute လုပ်ဖို့ရာ ဘယ်နေရာမှာသိမ်းသလဲဆိုတော့ stack ထဲမှာသိမ်းပါတယ်။ Stack အကြောင်း ရှေ့ article မှာ ပြောပြီးပါပြီ။ Stack ဆိုတာ last-in-first-out (LIFO) ပါ။ နောက်ဆုံးထည့်တာ အရင်ထွက်ပါတယ်။ Function တွေကို stack ပေါ်ဘယ်လိုသိမ်းသလဲဆိုတာ မျက်စိထဲမြင်လာအောင် ကြည့်ကြည့်ရအောင်ပါ။ အပေါ်က code မှာ main ဆိုတဲ့ function က entry point လို့ယူဆကြည့်ရအောင်ပါ။ အပေါ်က code ကို run ကြည့်ရင် console ထဲ ဘာထွက်လာမယ်ထင်ပါသလဲ? “ABCD” လား? အမှန်ကတော့ “DCBA” ဆိုပြီးထွက်လာမှာပါ။ ဘာကြောင့်လဲကြည့်ရအောင်ပါ။ ပထမဆုံး main က a ကိုခေါ်တဲ့အတွက် stack ထဲမှာ a ကိုအရင်ထည့်ပါတယ်။ ထည့်တယ်ဆိုတဲ့နေရာမှာ function တစ်ခုရဲ့ return address, parameter pass ပေးလိုက်ရင် ပေးလိုက်တဲ့ param/argument, function ထဲက local variable တွေ စတာတွေကိုပါ stack frame တစ်ခုအနေနဲ့ဆောက်ပြီး push ပေးလိုက်တာပါ။ ရှေ့ဆက်ပြီးတော့ အလွယ် function name သီးသန့်ပဲရေးသွားပါမယ်။ a ထဲမှာက b ကို ခေါ်တယ် ပြီးမှ print “A” ဆိုတာကို ထုတ်တယ်။ Code တွေက line by line အလုပ်လုပ်တဲ့အတွက် print “A” တန်းထုတ်လို့မရသေးဘူး b ကိုအရင်ခေါ်ရဦးမယ်။ အဲ့တာဆို stack ထဲမှာဒီလိုဖြစ်သွားပါပြီ။ b ကလည်း c ကိုအရင်ခေါ်ထားတဲ့အတွက် function ခေါ်တိုင်း stack အပေါ် push ရပါတယ်။ c က d ကိုခေါ်တော့ ဒီလိုထပ်ဖြစ်သွားပါတယ်။ d ကိုရောက်တဲ့အခါမှာ တစ်ခြား function ကို ထပ်ခေါ်ထားတာမရှိတဲ့အတွက် stack ပေါ် push စရာမလိုပါဘူး။ d မှာဆုံးတဲ့အတွက် အရင်ဆုံး stack ရဲ့အပေါ်ဆုံး frame က စ pop လုပ်ပြီး execute လုပ်ပါတယ်။ အဲ့အခါ d ထဲက print(“D”) ကိုရောက်တဲ့အတွက် console ထဲကို “D” အရင်စ print ထွက်ပါတယ်။ Stack ပေါ်မှာ c, b နဲ့ a ကျန်ပါတယ် အဲ့လို stack empty မဖြစ်မချင်း stack frame တစ်ခုစီကို pop လုပ်သွားတဲ့အခါ အခုလိုထွက်လာပါတယ်။ “A” ကို print ထုတ်အပြီးမှာ နောက်ဆုံး stack က empty ဖြစ်သွားပြီးတော့ func a() ထဲမှာ print(\"A\") အပြင် ထပ်မရှိတော့တဲ့အတွက် main function ထဲကြည့်မယ်ဆိုရင်လည်း a() ကလွဲပြီး ကျန်တာမရှိတော့တဲ့အတွက် ဒီမှာတင် program exit ဖြစ်သွားပါတယ်။ အပေါ်ကလို stack ပုံစံနဲ့ဆွဲကြည့်တာမျိုးကို recrusive stack လို့ခေါ်ပါတယ်။ Recursion ကိုနားလည်ဖို့ဆိုရင် မျက"},{"id":"post-lets_talk_about_recursion_en","title":"Let’s talk about Recursion","section":"Blog Posts","href":"/blog/lets_talk_about_recursion_en/","keywords":"Recursion from the ground up: understand base cases, call stacks, and how recursive thinking solves the Tower of Hanoi, with clear Swift code examples. dsa recursion swift Data Structure Backtracking","body":"Introduction Recursion is something most programmers have at least heard of. When I first started programming, I didn't really understand it — I'd see a recursive call and immediately feel lost. It took me a good amount of time and deliberate practice before it finally clicked. I'm writing this to help others avoid going through the same struggle, so I'll try to explain recursion in the clearest, most approachable way I can. What is recursion? Recursion is when a function calls itself. Simply put: When calls itself like this, it keeps printing the same line endlessly. You can achieve the same infinite output without recursion using a loop: But say you don't want infinite output — you just want to print the numbers 1 through 5 in order. You'd use a loop (you could use too, but let's go with here): From this, you can understand that any loop can be rewritten using recursion. Let's rewrite that loop recursively: !Alt Text If that code felt confusing, take your time with the next section and read it carefully — it'll be worth it. Functions are stored on the stack when they're being executed. We covered stacks in a previous article — they follow last-in, first-out (LIFO) order. The last thing pushed in is the first thing to come out. Let's visualize how functions get stored on the stack: Treat as the entry point. What do you think gets printed when you run this? ? The actual output is . Let's see why. First, calls , so gets pushed onto the stack. When I say \"pushed\", I mean a full stack frame is created — including the return address, any passed-in parameters, and local variables. For simplicity, I'll just write the function names from here on. Inside , is called before , so since code runs line by line, we can't print yet. We need to call first: calls before printing, so the same thing happens: Then calls : doesn't call anything else, so nothing more gets pushed. This is where the stack starts popping. The top frame is popped and executed — runs first: The stack still has , , and . They keep getting popped one by one until the stack is empty: After is printed, the stack is empty. There's nothing left in or , so the program exits. This way of visualizing function calls is called a recursive stack. Visualization is crucial for understanding recursion. As you read this article, try drawing the recursive stack alongside it — trace each function being pushed in, then popped back out, one by one. Once you have the recursive stack down, let's look at the recursive tree. Knowing tree data structures helps, but since trees are also best understood through recursion, it's a bit of a chicken-and-egg situation. I'll do my best to make it approachable. The recursive stack and the recursive tree are really just two different ways to visualize the same concept. If we view the stack frames from above as a tree, it looks like this: calls , which calls , which calls . Once we hit the bottom, we unwind back up through the stack, like this: After re"},{"id":"post-lets_talk_about_stack","title":"Let’s talk about the Stack data structure","section":"Blog Posts","href":"/blog/lets_talk_about_stack/","keywords":"Stack ဆိုတာ LIFO ပုံစံ data structure ပါ။ Swift code examples တွေနဲ့ push, pop, peek operations တွေနဲ့ real-world use cases တွေကို ရှင်းလင်းချပြထားပါတယ်။ dsa swift Data Structure","body":"Introduction DSA တွေထဲမှာ တော်တော်လေးရိုးရှင်းလွယ်ကယ်တဲ့ data structure တစ်ခုပါ။ Stack အကြောင်း အများစုကတော့ သိပြီးဖြစ်မှာပါ။ မေ့နေမှာစိုးလို့ရယ် စာပြန်နွှေးပြီးသားဖြစ်အောင်ရယ် နောက်ဆက်ပြောမယ့် recursion, tree, graph, dp တွေက stack နဲ့ပတ်သက်တာတွေဖြစ်နေတာကြောင့်ရယ် ဒီမှာပြန်နွှေးပေးလိုက်ပါတယ်။ Prerequisites Array For loop What is Stack? Stack ဆိုတာကတော့ last-in-first-out (LIFO) ပေါ့။ နောက်ဆုံးဝင်လာတဲ့ကောင်က ပထမဆုံး priority အနေနဲ့ ပြန်ထွက်သွားတာမျိုးပေါ့။ တစ်နည်းပြောရရင်တော့ နောက်ဆုံး latest item တွေကို ကြည့်ချင်ရင် stack ကိုသုံးသင့်တာပေါ့။ ဥပမာပေးရရင် စားသောက်ဆိုင်တစ်ခုမှာ ပန်းကန်တွေကို ဆေးပြီးတော့ ထပ်ထားတယ်ပေါ့။ !alt text သုံးတော့မယ်ဆိုတဲ့အချိန်ကျတော့ ထပ်ထားတဲ့ပန်းကန်တွေထဲက အပေါ်ဆုံးတစ်ချပ် (နောက်ဆုံးဆေးပြီး ထပ်လိုက်တဲ့ပန်းကန်) ကနေ စယူတာပေါ့။ ပန်းကန်အချပ် ၁၀၀ ထပ်ထားရင် ဘယ်သူမှ ဟိုးအောက်ဆုံး ပန်းကန်ကနေ စမယူဘူးလေ နော်။ မတော် အပေါ်ကထပ်ထားတာတွေပါ ကျကွဲနိုင်တာကိုး။ ဒီတော့ အပေါ်ဆုံးထပ်ထားတဲ့အချပ်ကနေ စယူတာပေါ့။ Code အနေနဲ့ ကြည့်မယ်ဆိုရင် ပြန်ထုတ်ကြည့်မယ်ဆိုရင် 5, 4, 3, 2, 1 ဆိုပြီး နောက်ဆုံးကကောင်က ပထမဆုံးထွက်လာတာပေါ့။ ဒီမှာ numeric value ကို example အနေနဲ့ပေးထားပေမယ့် stack ထဲမှာ ဘာမဆိုဖြစ်နိုင်တယ်။ နောက်ပိုင်း usecase တွေကိုပြောတဲ့အချိန်ကျရင် ပိုမြင်လာပါလိမ့်မယ်။ Standard stack operations Standard stack operations ဆိုတာက stack တစ်ခုမှာ ဘယ်လို functionality တွေပါသင့်သလဲ stack တစ်ခုကို ကျွန်တော်တို့ developer တွေအနေနဲ့ ဘယ်လိုမျိုး interact လုပ်ကြမလဲဆိုတာကို လေ့လာကြမှာဖြစ်ပါတယ်။ Push Stack ထဲကို value အသစ်ထပ်ထည့်တာပေါ့။ Pop Stack ရဲ့ ထိပ်ဆုံးက value ကို remove လုပ်ပြီး အဲ့ value ကို return ပြန်ပေးတာပေါ့။ Peek or Top Stack ရဲ့ ထိပ်ဆုံးက value ကို remove မလုပ်ဘဲနဲ့ value ကို return ပြန်ပေးတာပေါ့။ Pop နဲ့တူတယ်ထင်ရနိုင်ပေမယ့် peek က remove မလုပ်ပါဘူး။ isEmpty Stack က empty ဖြစ်နေသလား စစ်တာ။ isFull (Optional) တစ်ချို့ stack တွေက fixed-size ဖြစ်နေတာမျိုးရှိတယ်။ အဲ့လိုဆိုရင် item အသစ်ထပ်ထည့်လို့ရသေးလား မရလား စစ်တာပေါ့။ Simple Stack Implementation Array ကိုပဲ လုပ်သွားတာဆိုတော့ တော်တော်လေးဖတ်ရရှင်းမှာပါ။ Swift developer တွေအတွက် ဒီ stack ကို for loop နဲ့သုံးချင်တယ်ဆိုရင်တော့ Sequence protocol ကို implement လုပ်လိုက်ရင်ရပါတယ်။ ဒီနေရာမှာ တစ်ခုသတိထားစေချင်တာက struct နဲ့ class အသုံးလေးပါ။ တစ်ကယ်လို့သာ Stack<Value> က class သာဆိုရင် ကျွန်တော်တို့ for loop နဲ့ pop လုပ်သွားရင် stack ထဲမှာ ဘာမှကျန်တော့မှာမဟုတ်ပါဘူး။ ဒါပေမယ့် ကျွန်တော်က struct ကိုသုံးထားတဲ့အတွက် ဆိုပြီး အရင် copy ပြီးတော့မှ အဲ့ copy ကို pop လုပ်သွားတာမို့လို့ original stack ရဲ့ element တွေကို မထိခိုက်တာပါ။ Use cases Stack ကိုအသုံးများတဲ့နေရာတွေကတော့ navigation မှာပါ။ SwiftUI မှာဆိုရင် navigation stack, UIKit မှာဆိုရင် UINavigationController အားလုံးက stack တွေပဲဖြစ်ပါတယ်။ Usecase 1 နောက်ထပ် typical usecase ကတော့ bracket တွေ အဖွင့်အပိတ် ညီ/မညီ စစ်တဲ့ပုစ္ဆာမျိုးမှာပါ။ ဆိုကြပါစို့ string တစ်ခုပေးထားတယ် “(())()” ဆိုပါစို့။ ဒါဆိုရင် အဖွင့်ကွင်းနဲ့ အပိတ်ကွင်းက တူတဲ့အတွက် မှန်တယ်။ အဲ့လိုမဟုတ်ပဲနဲ့ “(()” ဆိုရင် ကွင်းက နှစ်ခါဖွင့်ပြီး တစ်ခါပဲ ပတ်ထားတဲ့အတွက် မှားတယ်ပေါ့။ ဒီလိုပုစ္ဆာမျိုးကို ဖြေရှင်းတဲ့နေရာမှာ stack ကို သုံးပြီး ဖြေရှင်းလို့ရပါတယ်။ Character stack တစ်ခု ဆောက်ပါတယ်။ String ထဲက character တစ်လုံးချင်"},{"id":"post-making_sense_of_apple_ai_ecosystem","title":"Making Sense of Apple’s AI Ecosystem: MLX, HuggingFace, CoreAI","section":"Blog Posts","href":"/blog/making_sense_of_apple_ai_ecosystem/","keywords":"A hype-free explanation of how Apple AI Ecosystem shares a single Swift interface. apple_intelligence foundation_models coreai mlx huggingface anylanguage large_language_model agentic_workflow WWDC26 WWDC26","body":"Introduction In my recent blog post, I discussed the Foundation Models framework and how it helps you build intelligent, agentic features on Apple platforms. If you haven't read that post yet, I'd recommend starting there first before continuing here. At its core, the Foundation Models framework will act as a frontend orchestrator, thanks to this year's protocol update 😉. It receives the user's prompt, decides which instructions to apply, which tools to invoke, and how to stitch the results together to get the best possible output. But that naturally raises the next question. What exactly is powering the engine underneath? That's what this post is about. We're going one layer deeper, into the models themselves. You'll learn how to use LLMs locally with MLX how MLX helps LLM provider like Anthropic to bring their models to work with Foundation Models APIs integrate open-source LLM models to Foundation Models framework via Hugging Face(AnyLanguage) and fine tune via CoreAI If the Foundation Models framework is the frontend orchestrator, what we're covering today is the backend, the actual engine that makes your features run. Hardware Requirements MLX is purpose-built for Apple Silicon, so the first requirement is simple, you need a Mac with an M-series chip. Intel Macs are not supported. Beyond that, the real constraint is unified memory. Unlike a traditional GPU setup where you'd need to worry about VRAM separately, Apple Silicon shares one memory pool between the CPU, GPU, and Neural Engine. That's actually great news for running large models, because the entire pool is available to MLX. The practical implication is quite straightforward, the bigger the model, the more RAM you need. Here's a rough guide based on 4-bit quantised model variants (approximate figures, actual requirements vary by model architecture though) | Unified Memory | Models you can run | |---|---| | 8 GB | Up to ~3B parameter models (e.g. Llama 3.2 3B 4-bit) | | 16 GB | Up to ~8B parameter models (e.g. Llama 3.1 8B 4-bit) | | 32 GB | Up to ~34B parameter models | | 64 GB+ | 70B models and beyond | <br/>If you're on M5, there's a bonus. All Apple Silicon Macs have a Neural Engine, but M5 adds dedicated Neural Accelerators on top of it. MLX targets these automatically for matrix multiplication, the core operation during prompt processing, and the result is a 4x speedup over M4 with zero code changes on your part, cool, right? In fact, MLX selects the best kernel for whatever hardware you're running on so no need to worry. For most developers following this blog post, a 16 GB M-series Mac is a comfortable starting point. If you want to experiment with larger frontier-class models, 32 GB or more gives you meaningful headroom without needing aggressive quantisation. Hugging Face If you haven't come across Hugging Face before, think of it as the npm registry for machine learning models. Researchers and teams publish model weights there openly, and anyone can download and use th"},{"id":"post-modern_swift_testing_1","title":"Modern Swift Testing: The Complete Guide - 1","section":"Blog Posts","href":"/blog/modern_swift_testing_1/","keywords":"Learn Swift Testing from scratch: the @Test and #expect macros, test doubles, parameterised tests, tags, XCTestPlan for CI lanes, and actor isolation. swift swift_testing testing test_doubles XCTestFramework Swift Testing","body":"Introduction TL;DR: In this article, we will explore the fundamentals of Swift Testing, its key features, and practical ways to use it in your iOS projects. Before diving in, a bit of background will help you understand why things are designed the way they are. You can skip straight to the Swift Testing section if you just want the framework itself. As developers, we write code. But humans are prone to error, and no amount of careful typing prevents logic bugs from sneaking in. Test cases are how we catch those errors early, before they reach production. Think of tests as a safety net. If you are tasked with refactoring a critical payment component, how do you make sure your changes do not break existing behaviour? You write tests that describe what the code is supposed to do, then run them after every change. If something breaks, you know immediately, rather than hearing about it from users. Beyond catching bugs, good tests tell a story. They document the use case of a class or component, capturing a snapshot of your intended logic. Six months from now, when you need to make a change and can no longer remember why a specific condition exists, those tests will be your documentation. For years, iOS developers relied on XCTest. Some teams also reached for Quick and Nimble, a pair of libraries that bring BDD (Behaviour-Driven Development) to Swift with a more expressive, English-like API. Both got the job done, but they came with boilerplate and limitations that felt increasingly out of place in modern Swift. With Xcode 16, Apple shipped a next-generation testing framework built specifically for Swift, Swift Testing. It is leaner, more expressive, and takes full advantage of modern Swift language features like macros and structured concurrency, with first-class support for things like parameterised tests (though it can be an anti pattern). It is also part of the open-source Swift project, so it works on Linux too, not just Apple platforms. The Unit Test A unit test exercises one small, isolated piece of behaviour in your code. A \"unit\" is typically a single function or a small class, tested in complete isolation from its dependencies. I will convince you why UTs have the highest ROI with three reasons: Speed Speed Speed! A unit test runs in milliseconds. You can run hundreds of them in the time it takes a single UI test to launch the simulator. I will show you some tricks to enhance your unit test's speed in this article. Isolation. Because you control the inputs and replace dependencies with fakes, you can test edge cases that are nearly impossible to reproduce in a real running app. Stability. Unit tests are scoped under specific condition, and they pass or fail based on logic alone. With AI coding tools, unit tests become more relevant, not less. For every bug you encounter, resist the urge to ask the AI to just fix it. Instead, ask it to first reproduce the problem with a failing test case. Only once that test is in place, ask it to fix the bug,"},{"id":"post-modern-swift-testing-2","title":"Modern Swift Testing: The Complete Guide - 2","section":"Blog Posts","href":"/blog/modern-swift-testing-2/","keywords":"Master Swift Testing: dependency injection patterns, auto-generated mocks with Mockolo, Cuckoo, and Sourcery, snapshot testing for UI and data models, and macro testing. swift swift_testing testing test_doubles snapshot_testing Swift Testing","body":"Introduction Testing is the part of software development that most developers say they want to do more of, and the part that gets cut the moment a sprint starts slipping. Part of the reason is friction. The tooling is unfamiliar, the setup takes time, and the payoff is not visible until much later. This guide is about removing that friction. Part 2 picks up where the part 1 leave off. You will learn how to inject dependencies properly so your tests are not at the mercy of live network calls, how to generate mock types automatically instead of writing them by hand, how to get failure messages that actually tell you what went wrong, and how to capture visual and structural snapshots of your code so regressions surface in CI instead of user reports. If all those sound good to you, let's dive right in! Dependency Injection for Testing Why \"Hard to Test\" Usually Means \"Hard to Inject\" Here is a simplified pattern most iOS developers have written at least once in their career This looks completely reasonable at a first glance. But the moment you try to write a test for , you hit a wall. The view model reaches out and grabs itself. I am not saying singleton is bad, in fact, I also use them a lot. However, there is no seam to slip in a fake network layer, no way to simulate a 401, no way to test the error path without actually hitting the internet. The test either becomes a flaky integration test or it never gets written at all. The same pattern shows up with , , called inline, or a singleton analytics client. Any time a type creates or reaches for its own collaborators, you lose control over the test environment. The fix is always the same. Don't let the type decide what it works with. Hand it in from outside. Protocol-Based Dependency Injection The classic DI approach is to extract a protocol and inject a conforming type: Now your test can inject a mock: This works, and it is the approach you will see in most codebases. But it has real costs. Every new dependency gets its own protocol. Every mock struct duplicates the protocol's shape. When you add a method to , every mock in every test file needs updating. In a large codebase, protocol proliferation becomes its own maintenance problem. Now, you can solve this via promoting the logically related methods into aspects and do the AOP dance but let's leave this for an another blog post. Type-alias Based DI If you look at the shape of , you pass in a and get back a . That is all the call site actually cares about. It does not care how an endpoint is constructed, or that a exists at all. So you can strip the protocol away entirely and inject the function directly: In a test, you pass a closure inline — no mock type needed at all: The entire test doubles story collapses into a one-liner. The tradeoff is that the closure type carries no name or documentation — if you have several similar function-shaped dependencies, they start to look alike at the injection site. For a single dependency, this is the lig"},{"id":"post-My WWDC 2026 Manifestation","title":"Dub-Dub 26 Manifestation","section":"Blog Posts","href":"/blog/My WWDC 2026 Manifestation/","keywords":"Everything I Want That Apple Probably Won't Give Us thoughts WWDC WWDC26 swift wwdc26_wishlist WWDC26","body":"Introduction Everyone in the Apple developer community is currently posting and buzzing about Apple's big event, WWDC26. It happens once a year, dropping massive updates across all Apple platforms, and I just hope I am not joining the conversation too late. Oh, and by the way, Apple recently released their official All Systems Glow wallpaper collection for Mac, iPad, and iPhone. I have already downloaded and set it on my MacBook, but if you haven't grabbed it yet, you can download it here. Preparation Now, even though I say \"preparation,\" don't stress out. I am just sharing this based on my own past mistakes. First, make sure to download the latest Apple Developer app to watch the upcoming sessions. And please remember that you have at least a full year to absorb all the information they are going to present, so don't feel like you've already missed the boat. The second thing I would prepare for is updating my macOS version. I saw Antoine van der Lee share his thoughts about this in a recent article, and while I completely share his frustration with the yearly update cycle, it is a necessary evil. Finally, a golden rule you likely already know, never install beta software on your work machine. I only install betas and run my WWDC experimentations on a personal laptop. Doing so on a machine you rely on for your day job is a terrible idea for obvious reasons. How I See Things Hype is just hype, but what matters is reality, _what does this actually mean for us as developers?_ If you are an indie developer, your approach is going to be a little different. If you are a student, hey, take your time and just enjoy the show, and keep trying things out, learn how they design those APIs etc. But if you are like me and work full-time, your company or your squad has a dedicated goal to achieve and product promises to deliver. So, all the cool announcements aside, we still have to deal with our day-to-day responsibilities. The way I approach this influx of new tech is through a specific lens, What does it mean for my team, or for the product I am actively building? If something is genuinely cool and immediately useful, I take notes and dig deep. If something looks shiny but lacks an immediate return on investment (ROI) — or is just a fancy gimmick — I throw it into my \"revisit later\" bucket. If something is going to break our existing app, change our architecture, or require immediate refactoring, I take serious notes and raise it with the team right away. AI-Agnostic Xcode Without a shadow of a doubt, Artificial Intelligence is going to be the dominant topic again this year. It is no secret that Apple has lagged behind in the AI-assisted coding era, so I am expecting a much more ergonomic AI workflow inside Xcode. On a day-to-day basis, I personally prefer the command line, using TUIs like or alongside tools like Claude Code. I am perfectly fine with a terminal-driven workflow. That said, we desperately need first-class agentic support from Apple. Last yea"},{"id":"post-questions_mobile_developer_should_ask","title":"Mobile/Frontend Developer တစ်ယောက်အနေနဲ့ မေးသင့်သောမေးခွန်းများ","section":"Blog Posts","href":"/blog/questions_mobile_developer_should_ask/","keywords":"UI/UX Designer/Product Manager က design handoff ပေးလိုက်ပြီဆိုရင် ဘာတွေမေးရမလဲ? thoughts Career Advice","body":"Introduction ကျွန်တော် ဒီအကြောင်းအရာလေးကို ဒီနှစ် VarCamp မှာ ပြောမယ်လို့ စာရင်းပေးခဲ့ပါတယ်။ ဒါပေမယ့်လည်း အကြောင်းအမျိုးမျိုးကြောင့် ဒီနှစ်မပြောဖြစ်ခဲ့ပါဘူး။ ပြောမယ့်အကြောင်းအရာတွေအများကြီးထဲကမှ ဒီအကြောင်းအရာလေးကို မပြောဖြစ်ပေမယ့်လည်း article လေးတစ်ပုဒ်လောက်ရေးပြီး မျှဝေလိုက်ရပါတယ်။ ဒီ topic က မြန်မာ developer တွေအတွက်ရည်ရွယ်တာကြောင့်မို့လို့ မြန်မာလိုပဲဆက်ရေးသွားပါမယ်။ Input Field Design မှာ text box ပဲဖြစ်ဖြစ် user ရိုက်ထည့်လို့ရတဲ့ input field တစ်ခုပါပြီဆိုတာနဲ့ အနည်းဆုံးခေါင်းထဲမှာ အခြေအနေ လေးမျိုး တွေးဖို့လိုတယ်။ Input မထည့်ရသေးခင် neutral state Input ရိုက်ထည့်ဖို့ cursor ချလိုက်တဲ့အချိန် active state Input ထည့်ပြီး validate တော့မှ မှားသွားလို့ပြရမယ့် error state တစ်ချို့သောအခြေအနေတွေမှာ hit testing ပိတ်ထားရမယ့် disable state ဆိုပြီး အခြေအနေ အနည်းဆုံးတော့လေးမျိုးရှိတယ်။ အဲ့တော့ ပေးထားတဲ့ design file မှာ အဲ့လေးမျိုးပါပြီလား မပါဘူးဆိုရင် ပြန်မေးဖို့လိုတယ် အမြန်ဆုံး ပေးဖို့လိုတယ် app တစ်ခုလုံးကို ဒီ state တွေနဲ့ UI က share သုံးသွားရဖို့ရှိတဲ့အတွက် ဖြစ်နိုင်ခြေရှိတဲ့ state တွေ၊ ပုံမှန်ဆိုရင်တော့ လေးခုပေါ့နော် အဲ့တာတွေကို ရှင်းရှင်းလင်းလင်းသိပြီးမှ နောက်ပြန်သုံးရလွယ်အောင် အချိန်ယူရေးသွားရင် နောက်ကျ အချိန်ကုန်သက်သာပါတယ်။ Form Validation Input field တွေပါလာပြီဆိုကတည်းက user ကိုဖြည့်ခိုင်းတဲ့ form တစ်ခုရှိလာပြီလို့ ယူဆရမှာပေါ့။ အဲ့တော့ form ရှိပြီဆိုရင် အဲ့ form က အမြဲ valid ဖြစ်နေမှာလား invalid ရောရှိနိုင်သလားပေါ့။ ဆိုကြပါစို့ form က valid နဲ့ invalid ဆိုပြီး အခြေအနေနှစ်မျိုးရှိနိုင်တယ်ပေါ့။ အဲ့အချိန်မှာစဥ်းစားရမှာက invalid ဖြစ်သွားရင် input field တွေကိုပါ error state နဲ့ပြမှာလား တစ်ကယ်လို့ invalid ဖြစ်တာနဲ့ input field ကို error state နဲ့ ပြမယ်ဆိုရင် ဘယ်အချိန်မှာ validate လုပ်မလဲ? Key stroke တစ်ခုစီတိုင်းလိုက် validate မှာလား CTA (call to action) button လို့ခေါ်တဲ့ နောက်တစ်ဆင့်ကိုဆက်ခေါ်သွားမယ့် button ကိုနှိပ်မှ validate လုပ်မှာလား စသဖြင့် ဒါမှမဟုတ် valid ဖြစ်တော့မှ CTA button ကို enable လုပ်ပြီး invalid ဖြစ်ရင် disable လုပ်မလား (ဒါဆို input state က error ပြစရာမလိုဘူး များသောအားဖြင့်) အဲ့သုံးချက်ကို design ပေးထားတာမှာပါသလား မပါရင် ပြန်မေးရမယ်။ ပြောချင်တာက form မြင်ပြီဆိုရင် validation ဘယ်အချိန်စစ်မလဲ valid ဖြစ်ရင်ဘာလုပ်မလဲ invalid ဖြစ်ရင်ဘာလုပ်မလဲ ဘယ် field က optional လည်း ဘယ်ကောင်က mandatory လဲ စသဖြင့် ဆန်းစစ်ပြီး မေးခွန်းထုတ်တတ်ရမယ်။ Listing App တိုင်းက list နဲ့မကင်းဘူး။ Horizontal list တွေလည်းရှိတယ်။ Vertical list တွေလည်းရှိတယ်။ List မြင်ပြီဆိုရင် စစ်ရမယ့် ဂရုပြုရမယ့်အရာ ၄ ခု ရှိတယ်။ List ထဲမှာ item တစ်ခုမှမရှိရင် ဒါမှမဟုတ် API fail ခဲ့ရင် ဘာပြမလဲ? Empty state အတွက် UI ရှိပြီလား? ဒါမှမဟုတ် cache ထဲကဆွဲပြမှာလား? အဲ့ list က see more ရှိလား? ရှိခဲ့ရင် အများဆုံး ဘယ်နှစ်ခုပြမှာလဲ? See more မရှိခဲ့ရင် ဒီ list က pagination ရှိမှာလား? Pagination UI ကရော ဘယ်လိုဖြစ်မှာလဲ? List ကို pull to refresh (mobile မှာတော့ ပိုတွင်ကျယ်တာပေါ့) လုပ်လို့ရမှာလား? ဒါက ကျွန်တော်မှတ်မိသလောက်ပြောတာ။ ကိုယ့် app ရဲ့ business logic အပေါ်မူတည်ပြီး ဒီထက်ပိုများဖို့သာရှိတယ်။ ပိုနည်းဖို့မရှိဘူး။ Loading style API call တွေ ခေါ်ရပြီဆိုရင် user ကို loading ပြရမယ်။ ကောင်းပြီ။ ဒီလိုဆိုရင် ဘယ်လို loading ပြမှာလဲ? App-wide overlay နဲ့ loading spinner ပြမလား? ဒါမှမဟုတ် shimmering vie"},{"id":"post-questions_mobile_developer_should_ask_en","title":"Questions Every Mobile/Frontend Developer Should Be Asking Before Building a Feature","section":"Blog Posts","href":"/blog/questions_mobile_developer_should_ask_en/","keywords":"Upon receiving a design hand off from, UI/UX Designer/Product Manager, what kind of questions would you be asking? thoughts Career Advice","body":"Introduction I originally signed up to give a talk on this topic at VarCamp this year. Unfortunately, for various reasons, I didn’t end up presenting it. Out of all the topics I had planned to talk about, this was one that never made it onto the stage. Still, I thought it would be worthwhile to write an article and share it instead. Since this topic is primarily aimed at Myanmar developers, I originally wrote it in Burmese. This English version is a translated and polished adaptation of that article. Input Fields Whenever you see a text box or any input field where users can enter data, there are at least four states you should immediately think about: Neutral state (before any input is entered) Active state (when the cursor is focused on the field) Error state (when validation fails) Disabled state (when interaction should be blocked) At a minimum, every input field has these four states. When reviewing a design file, check whether all of these states are defined. If they aren't, ask for clarification as early as possible. Since these UI states will likely be reused throughout the entire app, it's worth spending extra time upfront to clearly define and implement them in a reusable way. Doing so saves a lot of time later. Form Validation As soon as input fields appear, you can assume there's a form involved. A form can generally be either valid or invalid. Once you establish that, there are several important questions to ask: Should invalid fields display an error state? If errors should be shown, when should validation occur? On every keystroke? When the user taps a CTA (Call-To-Action) button? Alternatively, should the CTA button remain disabled until the form becomes valid? If the button is disabled when the form is invalid, you may not even need explicit error states in many cases. These behaviors should be specified in the design. If they're not, ask. Whenever you encounter a form, you should naturally start thinking about validation timing, valid and invalid states, optional versus mandatory fields, and any related user flows. Lists No application is completely free from lists. Some are horizontal, some are vertical. Whenever you encounter a list, there are at least four things to consider: What happens if the list is empty or the API fails? Is there an empty state design? Should cached data be displayed instead? Is there a \"See More\" option? If so, how many items should be shown before it appears? If there is no \"See More,\" does the list use pagination? What does the pagination experience look like? Does the list support pull-to-refresh? (Especially important on mobile.) These are just the ones I can recall off the top of my head. Depending on your application's business requirements, there are usually more considerations—not fewer. Loading States Whenever you're making API calls, users need some form of loading feedback. The question is: what kind? A full-screen loading overlay with a spinner? A skeleton/shimmer loading vie"},{"id":"post-Swift Package Traits","title":"Swift Package Traits","section":"Blog Posts","href":"/blog/Swift Package Traits/","keywords":"Swift Package Traits let you add opt-in features to your packages without dragging in unused dependencies. Learn how to define and use them from scratch. swift spm swift_package_manager Xcode Swift Package Manager","body":"Introduction Here is a situation every library author has run into at some point. You write a solid, focused library. Then someone on the team asks, \"Can we add Firebase support?\" You add it. Then another team says they want CloudKit instead. You add that too. Before long, every consumer of your library is dragging in Firebase, CloudKit, and three other SDKs just to get basic console output., even the teams that never needed any of it 😅 SE-0450 gives us a clean answer to this called Swift Package Traits, shipped in Swift 6.1. Think of traits as build-time feature flags that live right inside your . They let you say \"pull in Firebase only if the consumer explicitly asks for it\" and the toolchain handles the rest. In this article, we will build a logging library called from package definition level and use it as our canvas to explore traits from every angle, defining them, conditional compilation, enabling them as a consumer, testing, and running them from the terminal. If that's sound interesting to you, let's get into it. The SwiftLogger Throughout this article we will work with a logging library that has three modes: Console logging — the default, always available, works everywhere. Firebase logging — syncs log entries to Firebase Crashlytics for remote monitoring. Verbose logging — attaches the file name, function, and line number to every entry, great for debugging. Without traits, you would either ship three separate packages or bundle everything together and let consumers ignore what they do not need. With traits, consumers get exactly what they ask for, and nothing else. Quick note: is a concept demo, not a production-ready logging design. A real logging library would involve structured log levels, thread safety, formatters, output destinations, and more — that is a whole topic on its own. We are keeping it minimal here so the traits concepts stay in focus. Defining Traits in Package.swift Let's start with the for . We will walk through the interesting parts right after: The array is the new piece of the puzzle. Each entry is a — a name, an optional description, and an optional list. That last field is for trait-chaining. If you write , enabling automatically enables too. Our traits here are independent so we leave those empty, but it is a useful tool when one feature logically implies another. The call tells SPM which traits should be on automatically when someone adds the package without specifying anything. Here that is , so the logger works immediately without any setup. The really satisfying bit is down in . The Firebase iOS SDK is only downloaded and linked when is active. A consumer who just wants console output never fetches Firebase at all, not in the dependency graph, not in the build, not anywhere on their machine. Core Concepts Before we go further, let's talk through three ideas that are fundamental to how traits work. They sound a bit abstract at first, but they make total sense once you see them in context. Additiv"},{"id":"post-swift-nio-notes-1","title":"SwiftNIO မှတ်စု ၁","section":"Blog Posts","href":"/blog/swift-nio-notes-1/","keywords":"SwiftNIO နဲ့ server bootstrap လုပ်တဲ့အခါ သုံးတဲ့ options တွေ — backlog, SO_REUSEADDR, TCP_NODELAY, maxMessagesPerRead, recvAllocator — ကို နားလည်အောင် ရှင်းပြပေးထားပါတယ်။ swift swift_on_server swiftnio Swift on Server","body":"SwiftNIO ကိုသုံးပြီး server တစ်ခု bootstrap လုပ်တဲ့အခါမှာ သုံးလို့ရတဲ့ option တွေနဲ့ သူတို့ရဲ့ အကျိုးကျေးဇူးကို ဒီနေ့လေ့လာဖြစ်သလောက် ချရေးထားပါတယ် serverChannelOption(ChannelOptions.backlog, value: 256) ကျွန်တော်ကတော့ “the size of the waiting room outside your server’s front door” လို့အလွယ်မှတ်ထားပါတယ် user တစ်ယောက်က server ကို connect လုပ်ဖို့ကြိုးစားတဲ့အခါ SwiftNIO က ဒီ connection attempt ကိုမသိသေးခင် OS level မှာ TCP handshake လိုကောင်မျိုးတွေလုပ်ရပါတယ် ဆိုကြပါစို့ server ကတစ်လုံးတည်းရှိတယ် လူအယောက်ငါးရာလောက်က millisecond အတွင်း ပြိုင်ချိတ်ရင် server က အကုန် process မလုပ်နိုင်တဲ့အတွက် connection drop ပါမယ် အဲ့လိုမဖြစ်ရအောင် OS level handshake တော့ဖြစ်ပြီးပြီ ဒါပေမယ့် nio က လက်မခံနိုင်သေးရင် backlog ထဲမှာ connection ၂၅၆ ခုအထိ queue လုပ်ထားနိုင်တယ်လို့ configure လုပ်တာဖြစ်ပါတယ် ဒီပြသနာက network spike ဖြစ်တဲ့အခါ single server pov ကနေ connection drop မဖြစ်အောင် backlog ထဲ ထည့်နိုင်သလောက်ထည့်တာမျိုးပါ serverChannelOption(ChannelOptions.socket(SocketOptionLevel(SOL_SOCKET), SO_REUSEADDR), value: 1) Server တစ်လုံး boot လိုက်ရင် IP address နဲ့ port ပေါ်မှာ socket တစ်ခုသွားချိတ်ပါတယ်။ နောက်ပိုင်း server crash သွားလို့ဖြစ်ဖြစ် တမင်ပိတ်လိုက်လို့ဖြစ်ဖြစ် ပိတ်ပြီး ချက်ချင်း reboot ပြန်လုပ်တဲ့အခါ “address already in use” ဆိုတဲ့ပြသနာတက်ပါတယ် အကြောင်းက OS က ခုနက address နဲ့ network socket ကို ချက်ချင်းမပိတ်ပါဘူး ဘာကြောင့်လဲဆိုတော့ ခုနက server ပြုတ်သွားသည့်တိုင် နောက်ဆုံးချိတ်တုန်းက ကျန်ခဲ့နိုင်တဲ့ stray data packet တွေ ရှိနိုင်သေးတဲ့အတွက် connection အသစ်မှာ မှားပြီးမပါသွားအောင် ဒီ port ကို ခေတ္တ lockdown လုပ်ပါတယ် ဒါက safety feature ဖြစ်ပေမယ့် dev တွေအတွက်ဆို server ကို restart လုပ်ချင်တိုင်းတစ်မိနစ်လောက်ထိုင်စောင့်ရမှာဆိုတော့ အဲ့ lockdown ကို bypass လုပ်တဲ့ option ပါ value 1 ဆိုတာကတော့ True ဒီ feature ကို on မယ် လို့ပြောတာပါ childChannelOption(ChannelOptions.socket(IPPROTO_TCP, TCP_NODELAY), value: 1) ကျွန်တော်သိသလောက် swift-nio က netty (Java နဲ့ရေးထား) ကို swift ပြန်ပြောင်းထားတာပါ ဆိုတော့ အခေါ်အဝေါ်လေးတွေက channel ဆိုတာ connection ကို ပြောတာပါ နားလည်ထားသလောက်က server channel ဆိုတာက operating system ရဲ့ port ပေါ်မှာ သွားပြီး OS resource ကို ယူသုံးတဲ့ connection ဖြစ်ပြီးတော့ child connection ဆိုတာက ခုနက OS resource ကို ယူသုံးတဲ့ connection ကို လာ hit တဲ့ client (web, mobile) တစ်ယောက်ချင်းရဲံ connection ကို ခေါ်တာပါ အဲ့လိုဆိုရင် ယေဘူယျအားဖြင့် server connection ၁ ခုမှာ child connection n အထိရှိနိုင်ပါတယ် အပေါ်က option က child connection တစ်ခုစီတိုင်းမှာ Nagle’s Algorithm အရ built-in network buffering system ကို turn off လုပ်တာပါ ဆိုလိုတာက OS တွေက အင်တာနက်ပေါ်မှာ packet (data) တွေပို့တဲ့အခါ efficient ဖြစ်ဖို့ကြိုးစားပါတယ် အဲ့တော့ bandwidth ကိုချွေတာဖို့ data size သေးသေးလေးတွေ ခဏခဏပို့တာထက် ခဏလောက်စောင့်ကြည့်ပြီးမှ ခုနကသေးသေးလေးတွေပေါtooင်းပြီး ပို့ပေးလိုက်တာပါ အဲ့တာက bandwidth အတွက်ဖြစ်ပေမယ့် end user ဘက်က latency ရှိတဲ့အတွက် speed over bundle efficiency ကိုဦးစားပေးခိုင်းတဲ့ option ပါ childChannelOption(ChannelOptions.maxMessagesPerRead, value: 16) Client က data အကြီးကြီးပို့လိုက်ရင် swiftnio က client တစ်ခုတည်းကိုပဲ သူ့ resource အကုန်ပေးပြီး process လုပ်နေရပါလ"},{"id":"post-swift-nio-notes-1_en","title":"SwiftNIO Notes 1","section":"Blog Posts","href":"/blog/swift-nio-notes-1_en/","keywords":"SwiftNIO server bootstrap explained: backlog, SO_REUSEADDR, TCP_NODELAY, maxMessagesPerRead, and adaptive buffer allocation, each with a plain-language analogy. swift swift_on_server swiftnio Swift on Server","body":"Today, I’m putting together some notes on the options you can configure when bootstrapping a server using SwiftNIO, along with their benefits, based on what I've been learning recently. I like to think of this one simply as _\"the size of the waiting room outside your server’s front door.\"_ When a user tries to connect to the server, certain low-level operations—like the TCP handshake—happen at the OS level before SwiftNIO even knows about the connection attempt. Let’s say you have a single server instance, and around 500 people try to connect simultaneously within milliseconds. The server won’t be able to process them all at once, causing connections to drop. To prevent this, this option configures the OS to queue up to 256 completed OS-level handshakes in a backlog if SwiftNIO isn’t ready to accept them yet. When a network spike hits, this prevents connection drops from a single-server perspective by queuing as many incoming connections as allowed. When a server boots up, it binds a socket to a specific IP address and port. If the server crashes later or you intentionally shut it down, trying to reboot it immediately often triggers an \"address already in use\" error. This happens because the OS doesn't close the network socket immediately. Even after the server process is gone, there might still be stray data packets traveling through the network. To prevent these old packets from accidentally bleeding into a brand-new connection, the OS temporarily locks down that port. While this is a great safety feature, it means developers have to sit around for a minute waiting to restart the server during development. Setting this option to (which means ) turns on the feature that bypasses this lockdown. _As far as I know, SwiftNIO is essentially a Swift port of Netty (which was written in Java). Because of that, it inherits similar terminology. Here, a \"Channel\" basically refers to a connection._ _From what I understand, a Server Channel is the main connection that binds to the operating system's port and consumes OS resources. A Child Channel, on the other hand, refers to the individual connections from clients (like web or mobile apps) hitting that main server connection. So generally speaking, a single Server Channel can have $n$ number of Child Channels._ This particular option turns off the built-in network buffering system (Nagle’s Algorithm) for every individual child connection. By default, operating systems try to optimize how packets (data) are sent over the internet to save bandwidth. Instead of frequently sending tiny chunks of data, the OS waits a brief moment to batch those small chunks together before firing them off. While this is great for bandwidth efficiency, it introduces latency for the end-user. Turning this option on prioritizes speed over packet bundling efficiency. If a specific client sends a massive amount of data all at once, SwiftNIO could end up dedicating all of its resources to processing just that one client. To prevent t"},{"id":"post-tools-that-i-use-as-dev-for-productivity","title":"Tools that I use as a developer for productivity","section":"Blog Posts","href":"/blog/tools-that-i-use-as-dev-for-productivity/","keywords":"Developer တစ်ယောက်အနေနဲ့ ကျွန်တော် daily သုံးနေတဲ့ free macOS tools ၁၁ မျိုး — Shottr, Espanso, Lazygit, Raycast, Hammerspoon တို့အပါအဝင် — ကို မိတ်ဆက်ပေးပါတယ်။ tools","body":"ဒီနှစ်ပိုင်း အလုပ်များတာနဲ့ ကိုယ့်အတွက်အချိန်ပေးဖြစ်တာနဲ့ ဘာမှသိပ်မရေးဖြစ် မတင်ဖြစ်တာကြာပါပြီ အခုမှပြန်ပေါ်လာတော့ ပုံမှန်တင်မလားဆိုတာတော့ မသေချာဘူးပေါ့ ဒီနေ့ စိတ်ကူးပေါက်လို့ ကျွန်တော်နေ့စဥ် developer ဘဝမှာ အသုံးဝင်တယ်ထင်တဲ့ macos productivity tool (free guys, 100% free) တွေကို ပြောပြပေးချင်ပါတယ် Shottr Cleanshot သုံးဖူးရင် ဒီကောင်ကအတူတူလောက်သွားကျတယ် ပိုက်ဆံမပေးရတာတစ်ခုပဲ သူက screenshot ကိုမှ အထာကျကျ စက်ဝိုင်းနဲ့ဝိုင်းပြတာ စာထည့်တာ အလွယ်တကူလုပ်လို့ရတယ် ကိုယ်ရိုက်လိုက်တဲ့ကောင်က အမြဲ sticky ဖြစ်နေတော့ ပျောက်သွားလို့လိုက်ရှာရမှာ စိတ်မပူရဘူး pasteboard ထဲ auto ထည့်ထားရင် တန်းပြီး cmd v နဲ့ paste ရုံပဲ Espanso ဒီကောင်ကတော့ ကိုယ်အသုံးများတဲ့ text snippet တွေကို save လုပ်ထားပေးတာ ဥပမာ :lgtm လို့ရိုက်လိုက်ရင် “look good to me” လို့ အလိုလျှောက်ပြောင်းပေးသွားတယ် config က yml နဲ့ package တွေလည်းရှိပြီး dynamic placeholder တွေဘာတွေ လုပ်လို့ရတော့ dev တွေ ကလိလို့ကောင်းတယ် ကျွန်တော်ရုံးမှာသုံးနေကျ common phrase တွေ sentence structure တွေကို ဒီကောင်နဲ့ save ထားတော့ စာရိုက်ရင် အစအဆုံးရိုက်စရာမလိုဘူး မြန်တာပေါ့ သုံးတတ်ရင်သုံးတတ်သလို အသုံးတွင်တယ် BetterDisplay ကျွန်တော်ကတော့ free plan နဲ့သုံးနေတာ အခုထိအဆင်ပြေနေသေးတယ် ကျွန်တော့်လို့ dual monitor သုံးတဲ့သူတွေအတွက် external monitor ရဲ့ brightness ကို ကိုယ့် mac ကနေပဲ adjust လုပ်လို့ရတယ် လက်ရှိ active ဖြစ်နေတဲ့ device ရဲ့ brightness ကို adjust လုပ်ပေးသွားတာ HammerSpoon Mac automation လုပ်တဲ့ကောင် config က lua နဲ့ရေးထားတာ လွယ်တယ် မရေးတတ်လည်း AI ရေးခိုင်းလို့ရတယ် ဘာလုပ်လို့ရလဲဆို macOS app တစ်ခုချင်းစီကို hot key နဲ့ ကိုယ်ခိုင်းချင်တာခိုင်းလို့ရတယ် ကျွန်တော်ဆို ဘာတွေသုံးလဲဆိုတော့ iOS simulator ကို stay on top enable/disable ကို toggle လုပ်တဲ့ hot key ထားထားတယ် ဆိုတော့ တစ်ခါတလေကိုယ်ကအမြဲ simulator ကို float နေစေချင်တဲ့အခါ shortcut နဲ့လွယ်လွယ်ကူကူလုပ်လို့ရတာပေါ့ နောက်တစ်ခါ laptop နဲ့ external monitor ကို hot key နဲ့ active လုပ်တာမျိုး ဥပမာ အခုလက်ရှိ active က laptop ဆို hot key နှိပ်ရင် external monitor နောက်တစ်ခါထပ်နှိပ်ရင် laptop ကိုပြန် focus မဟုတ်ရင် mouse ကိုင်နေရမှာ မကြိုက်လို့ Lazygit Git client က GUI မသုံးဘဲ CLI သုံးနေတာကြာပြီ lazygit က တော်တော်လေးအလုပ်လုပ်ရမြန်တယ် vim motion ရရင်ပိုအဆင်ပြေတယ် နောက် custom diff pager တွေဘာတွေထည့်လိုက်ရင် ရှယ်ပဲ git worktree ဘာညာသုံးရင်လဲ lazygit က ကောင်းကောင်း visualise လုပ်ပေးနိုင်တယ် ဒီအကြောင်းက အကျယ်ရှင်းရင် post နောက်တစ်ခုဖြစ်မှာမို့လို့ဒီလောက်နဲ့ထားလိုက်မယ် Gh dash Lazygit နဲ့တွဲသုံးဖြစ်တာကတော့ GH dash ပဲ ထုံးစံအတိုင်း PR review တာတွေအတွက်က github web ui မသုံးဘဲ terminal ကနေပဲ တစ်နေရာတည်းကနေအကုန်ရလို့အဆင်ပြေတယ် နောက် PR fiilter တာကို custom tab တွေ config ရေးထားလို့ရတယ် Raycast အခုထိ free plan ပဲ အားလုံးလဲသိလောက်မှာပေမယ့် raycast မှာ custom plugin တွေထည့်ထားလို့ရတော့ jira ticket ကို JQL နဲ့ရှာတာတို့ color picker ထည့်ထားတာတို့ အကုန်သုံးလို့အဆင်ပြေတယ် Maestro Studio Develop လုပ်နေတဲ့အချိန် tedious ဖြစ်တဲ့ workflow တွေ interaction တွေကို ဒီကောင်နဲ့ setup လုပ်ထားရင် ကိုယ်ကထိုင်ကြည့်နေရုံပဲ local machine မှာလဲ run လို့ရတယ် android/mobile web ကိုလဲ ရှဲသုံးလို့ရတယ် အလွယ်ပြောရရင်တော့ UI Testing သဘောမျိုးပဲ appium ထက်သုံးရပိုလွယ်လို့ ဒါလေးသုံးဖြစ်တယ် Aerospace Window manager အနေန"},{"id":"post-tools-that-i-use-as-dev-for-productivity_en","title":"Tools that I use as a developer for productivity","section":"Blog Posts","href":"/blog/tools-that-i-use-as-dev-for-productivity_en/","keywords":"11 free macOS tools I rely on daily as a developer — Shottr, Espanso, Lazygit, Raycast, Hammerspoon, and more — each one worth your attention. tools","body":"It’s been a while since I last wrote or posted anything here, mostly because I've been busy this past year and focusing on taking some personal time. Now that I’m back, I’m not entirely sure if I’ll be posting regularly, but I felt inspired today to share some macOS productivity tools that I find incredibly useful in my daily developer life. And the best part? They are 100% free. Shottr If you’ve ever used CleanShot, this is very similar, except you don't have to pay a dime. It lets you take screenshots with style—you can easily draw circles, add text, and annotate on the fly. Plus, the screenshot you take can stay sticky on your screen so you don't lose track of it, and it automatically copies to your clipboard so you can just hit to paste it instantly. Espanso This one is a text expander that saves your frequently used text snippets. For example, if I type , it automatically expands into \"looks good to me.\" The configuration is done via YAML, it supports packages, and you can even set up dynamic placeholders, which makes it really fun for devs to tweak. I use it at work to save common phrases and sentence structures, so I don't have to type everything out from scratch. It saves a ton of time once you get the hang of it. I am currently exploring possibilities of having an emmet style auto complete for SwiftUI codes. BetterDisplay I’m currently using the free plan, and it has been working flawlessly for me. For anyone using a dual-monitor setup like me, this tool lets you adjust your external monitor's brightness directly from your Mac. It seamlessly adjusts the brightness of whichever display is currently active. HammerSpoon A powerful macOS automation tool. The config is written in Lua, which is pretty straightforward (and if you don't know how to write it, you can always just ask AI to do it for you). It essentially lets you bind hotkeys to control individual macOS apps and trigger custom actions. For example, I set up a hotkey to toggle whether the iOS simulator stays on top ( enable/disable). So whenever I need the simulator to float over my windows, I can do it easily with a shortcut. I also use a hotkey to switch focus between my laptop screen and my external monitor. If the current active focus is the laptop, pressing the hotkey jumps to the external monitor, and pressing it again brings it back. I set this up because I really hate having to reach for the mouse just to switch screens. Lazygit I haven’t used a GUI Git client in ages and have been using the CLI instead. Lazygit makes working with Git incredibly fast, especially if you already know Vim motions. If you pair it with a custom diff pager, it’s absolutely top-tier. It also does a fantastic job of visualizing Git worktrees. Explaining this one in detail would take up a whole separate post, so I’ll just leave it at that for now. Gh dash I use GH dash right alongside Lazygit. It allows you to handle PR reviews straight from the terminal without ever needing to open the GitHub we"},{"id":"path-foundation_models_ai_agents","title":"The Swift Developer's Path to Building AI Agents","section":"Paths","href":"/path/foundation_models_ai_agents/","keywords":"From your first LanguageModelSession to multi-agent orchestration with DynamicProfile, a complete map through Apple's Foundation Models framework. swift foundation-models ai on-device wwdc26 agentic","body":"Foundation Models Context Why On-Device AI? Prerequisites Swift Concurrency First Steps Your First Session Availability Checks Session Instructions Richer Output Structured Output Streaming Vision & Images Tools Native System Tools Custom Tools Memory Transcripts & Context Model Options Private Cloud Compute Third-Party Models Agentic Apps DynamicInstructions DynamicProfile Agentic Patterns Tooling & Quality Guardrails Evaluation fm CLI Ship It Debugging & Instruments Performance & Production"},{"id":"talk-example-talk","title":"Firebase ♥️ SwiftUl: Leveraging Indie Dev Productivity","section":"Talks","href":"/talks/example-talk/","keywords":"DevFest 2022 Yangon iOS Swift gdgyangon devfest #gdg","body":"Indie developer can rely on Firebase as it works extremely well with SwiftUI for rapid prototyping."},{"id":"talk-swift-concurrency-talk","title":"SWIFT CONCURRENCY A LIGHT TOUCH TO THE SCARY MONSTER","section":"Talks","href":"/talks/swift-concurrency-talk/","keywords":"VarCamp iOS Swift concurrency swift-actor","body":""},{"id":"talk-monkey-swift-talk","title":"Monkey wrote Swift for banana, now he does for the sake of love!","section":"Talks","href":"/talks/monkey-swift-talk/","keywords":"VarCamp iOS Swift concurrency swift-actor","body":""},{"id":"talk-developer-interview-3","title":"Developer Interview #3 (Meeting a lead iOS developer)","section":"Talks","href":"/talks/developer-interview-3/","keywords":"A Programmer Career Podcast Advice","body":""},{"id":"snippet-apns-push-triggers","title":"APNS Push Notification Triggers","section":"Code Snippets","href":"/wiki/snippets/apns-push-triggers/","keywords":"Copy-paste terminal commands to fire push notifications at the iOS Simulator — alert, silent, badge, rich media, category actions, and Live Activity. ios swift apns notifications bash","body":"Set to your app's bundle identifier once, then paste any block below. Alert with subtitle --- Silent / background push --- Badge-only update --- Rich media (image / video attachment) tells iOS to hand the payload to your Notification Service Extension before display. Your extension downloads the URL and attaches it as a . --- Notification preview (thumbnail) via attachment identifier --- Category with action buttons must match a identifier registered in your app. --- Time-sensitive (breaks through Focus / DND) Requires the entitlement. --- Critical alert (sounds even when muted) Requires an explicit entitlement from Apple. --- Live Activity update keys must match your struct."},{"id":"snippet-debounce-swift","title":"Debounce in Swift","section":"Code Snippets","href":"/wiki/snippets/debounce-swift/","keywords":"Prevent rapid-fire function calls using a lightweight debounce wrapper. swift concurrency patterns swift","body":"Useful when you need to delay execution until the user stops typing or scrolling."},{"id":"snippet-user-defaults-property-wrapper","title":"UserDefaults Property Wrapper","section":"Code Snippets","href":"/wiki/snippets/user-defaults-property-wrapper/","keywords":"A clean @AppStorage-style property wrapper for persisting values in UserDefaults. swift storage property-wrapper swift","body":"Wrap any value so it transparently reads and writes to ."},{"id":"glossary-apple-private-api-reference","title":"Apple Private API Reference","section":"Glossary","href":"/wiki/glossary/apple-private-api-reference/","keywords":"How to discover and call Apple's private APIs for debugging and tooling — what they are, how to find them, and why you must never ship them in a production app. ios objc runtime debugging private-api","body":"Do not ship private API calls in App Store builds. Apple's static analyzer scans submitted binaries for private symbol references and will reject the app. Use these techniques in debug builds, internal tooling, and during investigation only. Discovery Tools Before you can call a private API, you need to find it. These are the standard tools. class-dump | | Detail | |--|--------| | What | Reconstructs Objective-C class and method headers from a compiled Mach-O binary | | Why | Gives you a browseable file for any framework — private methods, properties, and ivars included | | How | Run against the framework binary inside the simulator runtime or a decrypted device binary | The output is a folder of files. Search them like any code: --- Hopper Disassembler / IDA Pro | | Detail | |--|--------| | What | Disassemblers that turn compiled ARM64 machine code back into readable pseudocode | | Why | When class-dump gives you the signature but not the behaviour — Hopper shows you the implementation | | How | Drag the binary into Hopper, let it analyse, then search by symbol name in the labels panel | Useful workflow: find the method in class-dump, search it in Hopper, read the pseudocode to understand what parameters it actually validates and what it returns. This is how you find out whether a private initialiser will crash if you pass for an undocumented parameter. --- LLDB at Runtime | | Detail | |--|--------| | What | The debugger attached to a running process — can inspect live objects, call methods, and print the full class hierarchy | | Why | The fastest way to explore a live object you already have a pointer to | | How | Pause in a breakpoint or use to attach to a running simulator process | --- Runtime Header Dumps (online) Several open-source projects continuously dump and publish the private headers for every iOS/macOS release. Search for \"iOS private headers GitHub\" — the most complete sets cover UIKit, Foundation, SpringBoard, BackBoardServices, and more. These save you from running class-dump yourself. --- Calling Private APIs Once you've found the method, there are several ways to call it depending on the language boundary. Objective-C The simplest approach for Objective-C methods. Bypasses the compiler's type checking entirely. | | Detail | |--|--------| | What | Sends a message to an object using a runtime selector string | | Why | No import needed — works on any object if the method exists at runtime | | Risk | No type safety; wrong argument type or count crashes immediately | Always guard with — private APIs can disappear in any OS update. --- Objective-C Runtime Direct Call () For methods with non- return types or multiple arguments, won't work. Cast to the correct function signature. | | Detail | |--|--------| | What | Direct call to the Obj-C message dispatch function with full type control | | Why | Handles , , , and multi-argument private methods that can't express | | Risk | You must get the type signature exactly right; a mi"},{"id":"glossary-claude-code-command-reference","title":"Claude Code Command Reference","section":"Glossary","href":"/wiki/glossary/claude-code-command-reference/","keywords":"A practical reference for Claude Code CLI commands — from installation and session management to slash commands, keyboard shortcuts, permission modes, and advanced automation patterns. claude ai cli developer-tools","body":"Installation & Authentication Start here. Before you can do anything else, you need Claude Code installed and your Anthropic account authenticated. | Command | What | When | |---------|------|------| | | Migrate from the npm package to the native binary | You installed via npm and want the faster, standalone version | | | Verify that your installation and system config are healthy | Something feels off — wrong model, missing tools, auth errors | | | Authenticate or switch to a different Anthropic account | First-time setup, or switching between personal and work accounts | | | Show which account is currently active | Confirming you're logged into the right account before billing-sensitive work | | | Clear stored credentials | Handing off a machine or revoking access | | | Manually pull the latest Claude Code version | Auto-updater is disabled, or you want a specific release right now | ------|------|------| | | Open an interactive REPL in the current directory | Day-to-day coding help, exploration, or conversation | | | Run a single query and exit without opening a REPL | Scripting, CI pipelines, or one-off answers from the terminal | | | Resume the most recent session | Picking up exactly where you left off after closing the terminal | | | Resume a specific session by its ID | Returning to a session that isn't the most recent one | | | Resume a session by its name | You named sessions deliberately and want to jump to the right one | | | Start a new session with a given name | Organising parallel work streams so sessions are easy to find later | | | Link a new session to a GitHub, GitLab, or Bitbucket PR | Reviewing or iterating on a pull request with full PR context loaded | --- Slash Commands — Basic Inside a running session, slash commands control Claude's behavior in real time. These are the ones you'll reach for in every session — checking status, managing cost, and switching models or effort levels. | Command | What | When | |---------|------|------| | | Show the current model, account tier, and active settings | You're unsure which model you're on or what's loaded | | | Display token usage and estimated cost for this session | Checking spend before a long agentic task, or after an expensive run | | | Switch the model mid-session | The task changed — swap to Haiku for speed or Opus for hard reasoning | | | Adjust reasoning depth: , , , , | Dial up for architecture decisions, dial down for formatting fixes | | | Summarize prior context and free up tokens | The session is getting long and responses are slowing down | | | Rename the current session | You started without a name and want to file it properly for later resumption | | | End the session cleanly | Done for now — cleaner than Ctrl-D when you want to confirm nothing is running | --- Slash Commands — Intermediate Once you're comfortable with the basics, these commands give you more control over the session flow — entering planning mode before Claude touches anything"},{"id":"glossary-corebluetooth-reference","title":"CoreBluetooth Reference","section":"Glossary","href":"/wiki/glossary/corebluetooth-reference/","keywords":"A plain-English dictionary for CoreBluetooth — what every confusingly-named class, concept, and quirk actually means, why it matters, and a concise code example for each. swift ios bluetooth ble","body":"The BLE API is full of names borrowed from the Bluetooth spec that mean nothing until you've read about 40 pages of protocol documentation. This glossary maps each term to what it actually does in your app. Peripheral The accessory — a heart rate monitor, a glucose meter, a pair of headphones, a custom embedded device you built. It sits at the spokes of the hub. The name comes from \"peripheral device\" in the sense of a computer peripheral (keyboard, mouse), not from \"peripheral vision.\" You care because is the object you get back from scanning and the one you call , , and on. Crucially, you must also hold a strong reference to every you want to keep connected — the central manager only holds a weak reference. --- Advertisement A small radio broadcast that a peripheral transmits every few milliseconds before any connection is made. Think of it as a sign a shop puts in its window: \"I'm here, here's my name, here's a hint of what I sell.\" The word comes from the Bluetooth spec's advertising channels (channels 37, 38, 39). You care for two reasons. First, you can read data from the advertisement packet without ever connecting — useful for beacons, proximity sensors, and anything that just needs to broadcast a value. Second, the dictionary has several unintuitive keys worth knowing. --- GATT Generic Attribute Profile. The layer of the BLE stack that defines how data is structured once you're connected. It's a hierarchy: a device exposes Services, each Service contains Characteristics, and each Characteristic can have Descriptors. The word \"generic\" just means it's not tied to any one device category. You care because every CoreBluetooth operation after connecting is a GATT operation. The spec also defines a library of standard services and characteristics with fixed UUIDs (the \"GATT spec\"), so a heart rate monitor from any vendor uses the same UUID for its heart rate measurement characteristic. --- Service A logical container for a group of related data points on a peripheral. A fitness tracker might expose a Heart Rate Service, a Battery Service, and a proprietary Firmware Update Service — all on the same device. The word \"service\" maps loosely to \"feature set\" not to a network service or microservice. You care because after connecting, your first job is always to discover services (more on that word below). You cannot access any data without going through a service first. You can filter to only the ones you need — discovering everything is slower and wastes power. --- Characteristic A single data point or control point inside a service. Think of a service as a table and a characteristic as a column. Each characteristic has a UUID, a value (raw ), a set of properties (can you read it? write to it? subscribe to notifications?), and optionally, descriptors. You care because characteristics are where the actual work happens — reading sensor data, writing commands, subscribing to live updates. The properties bitmask tells you what operations are leg"},{"id":"glossary-dynamic-linking-reference","title":"Dynamic Linking in Xcode","section":"Glossary","href":"/wiki/glossary/dynamic-linking-reference/","keywords":"How dynamic linking works in Xcode — what dylibs and frameworks are, how dyld resolves symbols at launch, and the trade-offs compared to static linking. ios xcode linking build-system dyld","body":"What is Dynamic Linking? Dynamic linking defers symbol resolution from build time to launch time. Instead of copying library code into your app binary, the linker records a dependency: \"this app needs , and it calls these symbols from it.\" When the OS launches your app, the dynamic linker () loads the required libraries into the process and patches up every symbol reference before runs. The Mach-O executable itself is smaller with dynamic linking, but the total app bundle is larger — the full must be embedded inside , and it ships to the App Store in its entirety. Dead code stripping does not cross the dylib boundary, so unused code inside a dynamic framework is never removed. A real-world conversion from dynamic to static linking typically produces a measurable bundle size reduction. ---|-----------| | dylib | A dynamic library — a Mach-O file with type . Contains compiled code and a symbol table. | | Framework | A bundle (directory) that wraps a dylib with headers, resources, and metadata. The dylib lives at . | | dyld | The Apple dynamic linker. Loaded by the kernel before your app starts; it resolves, loads, and initialises all linked dylibs. | | LC_LOAD_DYLIB | A load command in your Mach-O binary that names a dependency. dyld reads these to know what to load. | | RPATH | A search path embedded in the binary () that tells dyld where to look for dylibs at runtime. | | Shared cache | A pre-linked file on-device that contains all Apple system frameworks. dyld maps it into every process — no per-process disk load. | --- How dyld Works at Launch The kernel maps your app binary into memory and hands control to . dyld reads every command in your binary to build a dependency list. For each dependency it finds the dylib on disk (using RPATH and a fixed search order) and maps it into the process address space. dyld resolves symbols — patches the actual memory addresses of functions into the call sites that reference them. Initialisers (C++ static constructors, ObjC methods, Swift top-level code) run in dependency order. Control passes to your / . Steps 1-5 happen before any of your code runs. This is why a binary with many embedded dylibs has a slower cold launch — every additional dylib adds disk I/O, mapping, and symbol-binding work. --- System Frameworks vs. Your Own Dylibs This distinction matters a lot for performance. System frameworks (UIKit, Foundation, SwiftUI, etc.) live in the dyld shared cache — a single pre-linked file that ships with the OS. Every app on the device shares the same in-memory mapping. Linking against UIKit costs nothing at launch because it is already loaded. Your own embedded dylibs (your app's frameworks, third-party SDKs shipped as dynamic frameworks) are not in the shared cache and are not shared across processes. dyld has to find them on disk, map them, and bind their symbols individually at every cold launch. Each embedded dylib adds roughly 1-5 ms to launch time on modern hardware, but it compounds quickly. Cri"},{"id":"glossary-extreme-programming-reference","title":"Extreme Programming (XP) Reference","section":"Glossary","href":"/wiki/glossary/extreme-programming-reference/","keywords":"Extreme Programming concepts — values, practices, and roles — mapped to an iOS development context with what, why, and how for each. agile xp ios engineering","body":"What is Extreme Programming? Extreme Programming (XP) is an agile software development methodology created by Kent Beck in the late 1990s. It takes proven good practices — testing, code review, iteration — and turns the dial up to the maximum. If code review is good, review code constantly (pair programming). If testing is good, test everything before you write it (TDD). If integration is good, integrate many times a day (CI). From an iOS perspective, XP gives you a disciplined, team-scale answer to the question: \"How do we ship high-quality features on a two-week sprint without the codebase rotting under us?\" ----|------|-------------------| | Communication | Team members talk constantly — no silos | Prevents the \"two engineers implementing the same networking layer\" disaster | | Simplicity | Do the simplest thing that could possibly work | Avoids over-engineering HealthKit integration before the feature even ships | | Feedback | Short loops — tests, builds, and user feedback daily | Catches a broken SwiftUI layout in minutes, not after code review | | Courage | Refactor aggressively, delete dead code, tell the truth on estimates | Lets you remove a 3,000-line legacy controller without fear | | Respect | Everyone's contribution matters; no rockstar culture | Ensures the junior who found the memory leak gets the same voice as the tech lead | --- Core Practices Planning Game | | Detail | |--|--------| | What | Collaborative iteration planning where engineers estimate stories and the business prioritises them | | Why | Aligns what's valuable (the App Store feature) with what's feasible (the two-week sprint) | | How (iOS) | Break work into user stories: \"As a user I can filter my workout history by date.\" Engineers estimate in story points based on complexity — SwiftUI view vs. Core Data migration — not hours. Product picks the order; engineers pick the volume per sprint. | --- Small Releases | | Detail | |--|--------| | What | Ship to real users frequently — weeks, not months | | Why | App Store rejection or a bad UX discovery is cheaper to fix in week two than week twelve | | How (iOS) | Use TestFlight as your continuous delivery channel. Every sprint produces a TestFlight build. Separate feature flags (via a enum or a remote config like Firebase Remote Config) so unfinished work ships to the binary without being visible to users. | --- Test-Driven Development (TDD) | | Detail | |--|--------| | What | Write a failing test first, then write the minimum code to make it pass, then refactor | | Why | Forces you to design the API before the implementation — your interface becomes clear before a single line of production code exists | | How (iOS) | Use Swift Testing for unit tests and XCTest / XCUITest for integration and UI tests. Follow red-green-refactor strictly. | --- Pair Programming | | Detail | |--|--------| | What | Two engineers share one machine — one drives (writes code), one navigates (reviews, thinks ahead) | | Why | Catches bugs in rea"},{"id":"glossary-linux-commands-reference","title":"Linux Commands Reference","section":"Glossary","href":"/wiki/glossary/linux-commands-reference/","keywords":"A practical reference for everyday Linux commands — navigation, files, text manipulation, permissions, processes, and more. Each entry covers what the command does, when to reach for it, and a real example. linux terminal cli","body":"Navigation Start here. Before you can do anything useful in the terminal, you need to know where you are and how to move around. | Command | What | When | |---------|------|------| | | Print the current working directory | You're lost and need to confirm where you are | | | List directory contents | Checking what's in the current directory | | | List all files including hidden, in long format | You need to see permissions, sizes, and hidden files | | | Change into a directory | Moving around the filesystem | | | Switch to a directory and save the current one on a stack | You need to jump somewhere temporarily and come back exactly | | | Return to the last directory saved by | Returning after a detour | ------|------|------| | | Create an empty file or update its timestamp | Creating a placeholder file or resetting a timestamp | | | Create a new directory | Setting up a new project or folder structure | | | Copy a file or directory | Duplicating files before editing, or backing up | | | Move or rename a file/directory | Renaming files or reorganising directory structure | | | Delete a file | Removing temporary files or old artifacts | | | Create a symbolic link | Pointing a stable path to a versioned or nested target | | | Search for files matching a pattern | Locating files by name, type, age, or size across a tree | --- Viewing Files Before you can process or search files, you need to read them. These commands get content out of files and onto your screen. | Command | What | When | |---------|------|------| | | Print a file's entire contents to stdout | Short files or feeding content into a pipeline | | | Page through a file interactively | Reading long logs or files you don't want to flood the terminal with | | | Show the first 10 lines | Checking the format or header of a file quickly | | | Show the last 10 lines | Reviewing the most recent log entries | | | Follow a file as it grows in real time | Monitoring a live log during a deploy or debug session | | | Count lines, words, and bytes | Getting a quick sense of file size or line count | | | Identify a file's type without relying on the extension | Inspecting an unknown or binary file before opening it | --- Redirection & Pipes This is the glue that connects everything else. Once you know how to view files, you need to know how to chain commands together and control where their output goes — because most real-world terminal work is a pipeline. | Command | What | When | |---------|------|------| | | Redirect stdout to a file, overwriting it | Saving command output to a file for later review | | | Redirect stdout, appending to a file | Accumulating logs without wiping previous entries | | | Redirect stderr to a file | Capturing error output separately from normal output | | | Redirect both stdout and stderr to the same file | Capturing all output from a build or test run | | | Pipe stdout of one command into stdin of the next | Chaining tools into a processing pipeli"},{"id":"glossary-macho-reference","title":"Mach-O Binary Format","section":"Glossary","href":"/wiki/glossary/macho-reference/","keywords":"A plain-English dictionary for the Mach-O binary format — what every header field, segment, section, and load command actually means, why the layout exists the way it does, and how to inspect it yourself with the tools Apple ships. macho ios macos linker dyld toolchain","body":"Every executable, framework, dylib, and object file on Apple platforms is a Mach-O file. The name stands for Mach Object — a leftover from the Mach microkernel that NeXT adopted in the late 1980s and Apple inherited with macOS. Understanding its layout turns linker errors, crash reports, and code-signing failures from opaque noise into something you can read and reason about. Mach-O Header () What it is: the first 32 bytes of every 64-bit Mach-O file. It identifies the file as a Mach-O binary and describes its basic properties. Why it matters: reads these bytes before doing anything else. The magic number tells it the byte order; the CPU type tells it whether this binary runs on this hardware; the file type tells it whether this is an executable, a library, or an object file. The fields: | Field | Type | Meaning | |-------|------|---------| | | | (64-bit, little-endian) or (byte-swapped) | | | | , , etc. | | | | CPU variant — for pointer authentication | | | | , , , , | | | | Number of load commands that follow | | | | Total byte size of all load commands | | | | Feature flags: , , , … | How to read it: = (runnable program). = . = ( from the compiler). --- Fat Binary / Universal Binary What it is: a file that wraps multiple Mach-O binaries for different CPU architectures inside a single container. It begins with a followed by an array of structs, each pointing to a slice at a different offset. Why it exists: Apple silicon (arm64) and Intel (x86_64) Macs coexist. Rather than shipping separate downloads, a Universal Binary lets the OS pick the right slice at launch. During the Rosetta 2 transition and again with the arm64e / arm64 split for pointer authentication, fat binaries are how Apple ships one binary that runs on everything. How to inspect and create them: The magic is (big-endian, always — even on little-endian systems). reads the fat header, finds the best matching for the current CPU, seeks to that offset, and then reads the embedded Mach-O header as normal. --- Load Commands What they are: a variable-length list of instructions that immediately follows the Mach-O header. Each load command begins with an (what kind of command) and a (how many bytes it occupies), followed by command-specific fields. Why they exist: a static binary format can't anticipate everything that might vary between binaries — some have code signatures, some have encryption info, some link against 3 libraries, some against 300. Load commands are an extensible list that encodes only what is needed. iterates them in order and acts on each one it understands, ignoring types it doesn't recognize. The most important types: | Command | Purpose | |---------|---------| | | Maps a region of the file into the process's virtual address space | | | Tells dyld where to find binding, rebasing, and export info (modern) | | | Points to the symbol table and string table | | | Index of which symbols are local, external, or undefined | | | A dynami"},{"id":"glossary-method-swizzling-reference","title":"Method Swizzling","section":"Glossary","href":"/wiki/glossary/method-swizzling-reference/","keywords":"A plain-English guide to Objective-C runtime method swizzling — what it actually does under the hood, when you'd ever reach for it, and how to do it without shooting yourself in the foot. swift ios objc runtime","body":"Method swizzling sounds scarier than it is. At its core, it's just swapping two function pointers in a table at runtime. But because it touches the Objective-C runtime directly, it needs to be done carefully — the wrong timing or a missing call can produce bugs that only appear in production. IMP (Implementation Pointer) What it is: a bare C function pointer that points to the actual machine code for a method. Its type is , defined as . Why you care: when you call , you're swapping these pointers in the class's method table. After the swap, the selector points to your function's code, and your selector points to the original UIKit code. How to think about it: imagine a dictionary . After swizzling it becomes . Calling inside your swizzled method now actually runs codeBlock_A — the original — which is exactly what you want. --- SEL (Selector) What it is: a compiled, interned string that uniquely identifies a method name. compiles to a . Two selectors are equal if and only if their string representations are identical. Why you care: selectors are the keys in the method dispatch table. takes a to look up the struct you then pass to . How it's used in swizzling: --- What it is: two Swift keywords that opt a Swift method into the Objective-C runtime's dynamic dispatch mechanism. exposes the method to the Objective-C runtime and gives it a selector. tells the Swift compiler to always go through Objective-C message dispatch (i.e. look up the IMP at runtime) instead of calling the method directly. Without , the compiler may inline or devirtualize the call, bypassing the swizzled dispatch table entirely. Why you care: pure Swift methods are dispatched statically or through a Swift vtable — they never touch the Objective-C method table. That means swizzling them does nothing. A method must be (or be on an subclass where the method is already ) for swizzling to have any effect. How to apply it: --- vs What they are: two runtime functions for looking up method entries from a class's dispatch table. returns the for a method called on instances (the normal case: ). returns the for a method called on the class itself (). Why you care: swizzling the wrong one means your swap silently does nothing. If you're intercepting or a class-level factory method, use . For almost everything else, use . --- What it is: the single runtime function that performs the swap. It takes two values and atomically exchanges their pointers. Why you care: it's atomic, so the swap is thread-safe at the pointer level. However, the window between \"before the swap\" and \"during the first call after the swap\" is not protected — which is why you should always do swizzling at app launch before any concurrent code can call the method. How to use it: Always guard against before calling this. If the method doesn't exist (wrong class, typo in selector, method only exists in a subclass), returns and force-unwrapping crashes at startup. --- The Recursive-Looking Super Call What it"},{"id":"glossary-nfc-reference","title":"NFC on iOS Reference","section":"Glossary","href":"/wiki/glossary/nfc-reference/","keywords":"A plain-English dictionary for Core NFC on iOS — what every confusingly-named class, session type, and protocol quirk actually means, why it matters, and a concise Swift code example for each. swift ios nfc corenfc","body":"iOS NFC has two distinct session types, an acronym-heavy message format inherited from a thirty-year-old spec, and a handful of silent failure modes that will cost you a debugging afternoon if you don't know about them in advance. This glossary maps every piece of the API to what it actually does in your app. NDEF NFC Data Exchange Format. A lightweight binary message format standardized by the NFC Forum in 2004, designed to be small enough to fit on a passive sticker with 256 bytes of storage. The name is an acronym from the spec and tells you nothing useful about what it actually carries. You care because NDEF is the universal language of consumer NFC tags. The tap-to-open-a-URL, tap-to-share-a-contact, and tap-to-join-a-Wi-Fi-network features that users know from Apple Pay tags and product packaging are all NDEF messages. If you want your app to read or write the kind of tag a user can buy at any office supply store, you are working with NDEF. The alternative — raw low-level tag access — is for specialized use cases like transit cards or secure elements. --- NFCNDEFReaderSession vs NFCTagReaderSession These are the two session classes, and choosing the wrong one is the most common mistake in Core NFC. Despite similar names, they are for different jobs. is the high-level option. It understands NDEF and hands you parsed objects in its delegate callback. It works with any tag that contains NDEF data. Use this when you just want to read or write standard NFC tags. is the low-level option. It gives you raw access to the tag hardware and lets you send protocol-specific commands — ISO 7816 APDUs, ISO 15693 inventory scans, FeliCa service reads, MIFARE reads. Use this when you need to talk to transit cards, access control badges, or any tag that is not formatted with NDEF. Note: can also perform NDEF operations if you ask the discovered tag for its conformance. --- NFCNDEFMessage The top-level container for an NDEF message. It holds an array of records. A message can contain multiple records — for example, a Smart Poster record is typically an NDEF message with a URL payload record and a text title record inside the same message. The name \"message\" maps directly to the NDEF spec's message structure. You care because when writing to a tag, you construct an yourself and pass it to . The message's total byte size must not exceed the tag's capacity — most cheap tags are 144 bytes or 504 bytes. There is no automatic overflow handling; writing a message that is too large fails with an error. --- NFCNDEFPayload A single record inside an NDEF message. It contains four fields: a type name format (), a type identifier ( as ), an optional ID ( as ), and the actual content ( as ). The name is slightly misleading — represents the whole record structure, not just the raw payload bytes. You care because the raw field follows format-specific encoding rules that are non-obvious. A URL payload prepends a single byte indicating the URI scheme (0x01 for , 0x02 f"},{"id":"glossary-property-wrapper-reference","title":"Property Wrappers & Projected Values","section":"Glossary","href":"/wiki/glossary/property-wrapper-reference/","keywords":"A plain-English dictionary for Swift property wrappers — what @propertyWrapper, wrappedValue, and projectedValue actually do, why they exist, and how to write your own without getting confused by the dollar sign. swift ios swiftui","body":"Property wrappers are one of those Swift features that feel magic until you look at what the compiler is actually generating. Once you see that is just syntactic sugar for a hidden struct with a /, everything clicks — including why gives you something completely different. What it is: the required property every type must declare. It defines the type and behavior of the property as seen from the outside — the thing you get when you write . Why it matters: the name is not arbitrary. The compiler looks specifically for when generating the forwarding accessors. If you name it anything else, the build fails. How the compiler uses it: When you write: The compiler generates roughly this behind the scenes: You never write yourself — it's a compiler-generated private stored property. All reads and writes to go through the wrapper's accessors. The init rule: if your wrapper has an , the caller can provide an initial value with syntax. If it has , the attribute syntax provides and provides . If the wrapper has no at all, the property cannot use syntax and must be initialized through the wrapper directly. --- What it is: an optional second property you can add to a type. When it exists, writing in code gives you whatever returns, which can be a completely different type from . Why it exists: sometimes the wrapper needs to expose more than just the stored value. SwiftUI's stores an as , but through it exposes a — a two-way connection to the source of truth that can be passed down to child views. Without , you'd need a separate API surface to get that binding. How to add one: can return anything — the wrapper itself, a , a , a read-only snapshot. The type is entirely up to you. --- The Prefix What it is: syntactic sugar for accessing . Writing on a property wrapped with compiles to . Why the dollar sign: it was borrowed from Combine's convention where gives you the . The symbol has no special meaning in the language itself — it is purely a naming convention made concrete by the compiler. How to read it in context: | Syntax | Accesses | Type (for ) | |--------|----------|-------------------------------------| | | | | | | | | | | the wrapper itself | | The underscore prefix gives you the raw wrapper instance — useful when you need to call a method on the wrapper directly, or when you're initializing it manually. --- SwiftUI Wrappers Demystified The SwiftUI property wrappers all follow the same pattern — once you know vs , their behavior is predictable. | Wrapper | type | type | Typical use | |---------|--------------------|-----------------------|-------------| | | | | Local mutable state owned by this view | | | | | Reference to state owned elsewhere | | | | | Observable value inside an | | | | | External model object passed in | | | | | Model injected through the environment | | | | none | Read-only environment value | | | | | Persisted value backed by | The rule of thumb: if you need to pass the value"},{"id":"glossary-ssh-commands-reference","title":"SSH Commands Reference","section":"Glossary","href":"/wiki/glossary/ssh-commands-reference/","keywords":"A practical reference for SSH and its companion tools — connecting to servers, managing keys, tunnelling ports, transferring files, and hardening your setup, with real examples throughout. ssh linux devops security","body":"Connecting to a Server | Command | What | When | |---------|------|------| | | Open a remote shell session | Every time you need to work on a server interactively | | | Connect on a non-standard port | The server listens on a port other than 22 | | | Authenticate with a specific private key file | You have multiple keys and need to pick a particular one | | | Connect with verbose debug output | Diagnosing why authentication fails | | | Run a single command and exit | Scripting — you need a result without an interactive shell | | | Force a pseudo-TTY for the remote command | The remote command requires a TTY, such as or | | | Suppress all warnings and diagnostic messages | Scripting where only the command output matters | ------|------|------| | | Generate a new Ed25519 key pair | Creating a new SSH key — Ed25519 is the modern default | | | Generate a 4096-bit RSA key pair | When a service specifically requires RSA (e.g. older GitHub enterprise) | | | Add a comment to the key (usually your email) | Labelling keys so you can tell them apart in | | | Change the passphrase on an existing key | Updating a passphrase without regenerating the key pair | | | Print the fingerprint of a key file | Verifying a key's identity or checking for duplicates | | | Remove a host from | Clearing a stale entry after a server is reprovisioned | | | Copy your public key to a remote server | Setting up passwordless login in one command | | | Print your public key | Manually pasting your key into GitHub, GitLab, or | --- SSH Agent | Command | What | When | |---------|------|------| | | Start the SSH agent in the current shell | Setting up agent in a session before adding keys | | | Load a private key into the running agent | So you only type the passphrase once per session | | | List all keys currently loaded in the agent | Checking which keys are available for authentication | | | Remove a specific key from the agent | Revoking a loaded key without killing the whole agent | | | Remove all keys from the agent | Clearing all identities at once | | | Add a key that auto-expires after N seconds | Temporary access — key unloads itself after the time limit | --- SSH Config File () | Directive | What | When | |-----------|------|------| | | Define a host alias block | Shortening long commands to just | | | The actual hostname or IP | When your alias doesn't match the real hostname | | | Default username for the host | Avoiding the need to type every time | | | Default port for the host | Servers that don't listen on port 22 | | | Path to the private key for this host | Using per-host keys instead of the global default | | | Forward your local SSH agent to the remote host | Jumping through a bastion without copying keys to it | | | Send keepalives every N seconds | Preventing idle connections from being dropped by firewalls | | | Route the connection through a jump host | Reaching servers behind a bastion without manual multi-hop | --- Port "},{"id":"glossary-static-linking-reference","title":"Static Linking in Xcode","section":"Glossary","href":"/wiki/glossary/static-linking-reference/","keywords":"How static linking works in Xcode — what happens at build time, how static libraries and XCFrameworks are merged into your binary, and the trade-offs you actually care about. ios xcode linking build-system","body":"What is Static Linking? Static linking is the process of copying compiled code from a library directly into your app's binary at build time. By the time your hits a user's device, every function your app calls from a static library is already embedded inside the single Mach-O executable — no separate file, no runtime lookup. The linker () is the tool that performs this merge. It resolves every symbol reference (every function call, every global variable) against the object files and static archives it has been given, then writes a single output binary. Symbol Resolution The linker's main job is symbol resolution: matching every undefined symbol in your object files to a definition somewhere in the input. | Term | Meaning | |------|---------| | Defined symbol | A function or variable this object file implements | | Undefined symbol | A function or variable this object file calls but doesn't implement — must be found elsewhere | | Dead stripping | Removing defined symbols that nothing in the final binary actually references | Xcode enables dead stripping by default (). If you link a 500 KB static library but only call two functions from it, the linker discards the rest. This is one of the main advantages of static linking. --- Static Libraries vs. XCFrameworks | Format | Extension | Multi-platform? | Notes | |--------|-----------|----------------|-------| | Static library | | No — one arch/platform per file | Use to create a fat binary for multiple archs | | XCFramework | | Yes | A wrapper directory containing one (or ) per platform slice | An XCFramework is not a new kind of linker input — it is a directory structure Xcode uses to pick the right or for the current build destination before handing it to the linker. --- Build Settings That Matter | Setting | Key | What It Does | |---------|-----|--------------| | Other Linker Flags | | Pass raw flags to — , , | | Dead Code Stripping | | Strip unreferenced symbols (default ) | | Mach-O Type | | Set to to produce a from your own target | | Link Binary With Libraries | (Build Phases) | The Xcode UI for adding and inputs to the linker | flag When a static library contains Objective-C categories, the linker won't pull in the object file unless something directly references a symbol in it. Categories add methods to existing classes — there's no direct symbol reference — so the linker silently drops them. forces the linker to load all object files from every static library, regardless of whether a symbol was directly referenced. If you see \"unrecognized selector sent to instance\" at runtime after linking a static ObjC library, is almost always the fix. A more targeted version of . Forces the linker to load every object file from one specific archive, without affecting others. --- Creating a Static Library Target Set the build setting to . The output is a file in . For distribution across platforms, wrap it in an XCFramework: emits a file alongside the binary so consumers on different"},{"id":"glossary-swift-concurrency-reference","title":"Swift Concurrency Reference","section":"Glossary","href":"/wiki/glossary/swift-concurrency-reference/","keywords":"Keywords, quirks, and mental models for Swift Concurrency — from async/await basics to actors, Sendable, task groups, and the traps that catch everyone. swift concurrency ios","body":"/ The entry point for everything. marks a function that can pause mid-execution. is where that pause may actually happen. Neither keyword means \"runs on a background thread\" — they only describe suspension capability. | Keyword | What | When | |---------|------|------| | | Marks a function that can suspend at one or more points | Any function that calls another function or does I/O | | | Suspends the caller until the async expression resolves | Every call to an function — the compiler enforces it | | | Combines error propagation with suspension | Calling functions that are both and | ------|------|------| | | Starts an async operation immediately, in parallel with surrounding code | Fetching two or more independent pieces of data at the same time | --- The bridge from synchronous code into the async world. You create a when you need to start async work from a non-async context — like a button tap or . | API | What | When | |-----|------|------| | | Creates a new async task, inheriting the caller's actor isolation | Calling async code from a sync context, e.g. a button action | | | Awaits the task and returns its result | When you need the result of a task you stored in a variable | | | Requests cancellation of a running task | Stopping work that is no longer needed | | | Checks if the current task has been cancelled | Inside long loops or between async calls to bail out early | | | Throws if cancelled | Clean early exit from a long operation | --- Modifier (SwiftUI) SwiftUI's managed version of . The framework starts it when the view appears and cancels it automatically when the view disappears — no manual task storage needed. | API | What | When | |-----|------|------| | | Runs async work tied to view lifetime | Loading data when a view first appears | | | Re-runs the task whenever changes, cancelling the previous run | Reloading data in response to a changing value (search query, selected ID) | --- A task that deliberately breaks away from the caller's context. It doesn't inherit the actor isolation, priority, or task-local values of the code that created it. Use sparingly. | API | What | When | |-----|------|------| | | Creates a task with no inherited isolation or priority | CPU-bound background work that must not run on the main actor | --- When you have a dynamic number of parallel operations — a batch of files to encode, a set of records to validate — manages them as structured child tasks with automatic cancellation propagation. | API | What | When | |-----|------|------| | | Creates a group of child tasks that return a value | Parallel work that all succeeds — no throwing | | | Same, but any child can throw and cancel the group | Parallel work where a single failure should abort everything | | | Adds a child task to the group | Inside the group body, for each item you want processed in parallel | | | Awaits the next completed result in any order | Streaming results as they finish | --- The most common actor ann"},{"id":"glossary-swift-testing-reference","title":"Swift Testing Reference","section":"Glossary","href":"/wiki/glossary/swift-testing-reference/","keywords":"A complete API reference for Swift Testing — every macro, trait, and helper with its purpose, usage scenario, and a code example. swifttesting","body":"Declarations Start here. Every test begins with a declaration — marks the function, groups related tests together. | API | What | When | |-----|------|------| | | Marks a function as a test | Every test function you write | | | Test with a custom display name | When the function name alone doesn't capture the full intent | | | Groups tests and applies shared traits | When you want to name a suite or attach traits to all tests inside | | | Suite whose tests run sequentially | Tests that share state and cannot safely run in parallel | --|------|------| | | Non-fatal boolean assertion | Most checks; test continues after failure so all issues are visible | | | Asserts a specific error type is thrown | Testing error paths where you care about the type | | | Asserts a specific error value is thrown | Testing error paths where you care about the exact value ( required) | | | Asserts no error is thrown | Confirming a call that shouldn't throw actually doesn't | | | Unwraps an optional or stops the test immediately | When makes the rest of the test meaningless | | | Requires an error and returns it for inspection | When you need to check the thrown error's associated values | --- Traits With declarations and assertions in place, use traits to control when and how a test runs — without cluttering the test body with conditional logic. | API | What | When | |-----|------|------| | | Skips a test with a recorded reason | Test is blocked on an external dependency or tracked bug | | | Runs only when a runtime condition is true | Tests that require a specific environment variable or capability | | | Fails the test if it exceeds a duration | Async tests that could hang and block CI | | | Attaches a label for filtering | Organising tests by category, speed tier, or CI lane | --- Parameterised Tests If the same assertion needs to hold for multiple inputs, don't copy-paste the test — parameterise it. Each argument set becomes its own independent test case in the results. | API | What | When | |-----|------|------| | | One test case per element in a collection | Validating a fixed set of inputs against the same assertion | | | One test case per paired input/expected value | Mapping known inputs to known outputs — keep expected values as literals | | | One test case per combination of two collections | Testing every method × input pair (Cartesian product — grows fast) | --- Async and Events Synchronous assertions are straightforward, but testing async callbacks and publishers requires a different tool. lets you assert that a closure fires a specific number of times, with Swift's concurrency keeping everything structured. | API | What | When | |-----|------|------| | | Asserts an async callback fires exactly once | Testing delegates, closures, or publishers that should emit one event | | | Asserts an async callback fires exactly N times | Testing repeated emissions like progress updates | --- Known Issues Not every failure is worth fixing right n"},{"id":"glossary-xcbuild-reference","title":"xcodebuild Reference","section":"Glossary","href":"/wiki/glossary/xcbuild-reference/","keywords":"A practical reference for xcodebuild and the Xcode command-line toolchain — building, testing, archiving, signing, simulator control, and more with real examples. xcode ios swift ci","body":"Xcode Toolchain Selection Before you run any other command, make sure the shell is pointing at the right Xcode installation. controls which toolchain every downstream tool (, , ) will use. | Command | What | When | |---------|------|------| | | Print the path to the active Xcode developer directory | Confirming which Xcode version the shell is currently using | | | Switch the active Xcode installation | Running CI with a specific Xcode version or testing a beta toolchain | | | Install the Xcode Command Line Tools | Setting up a fresh machine or CI runner without full Xcode | | | Locate a specific tool within an SDK | Finding the exact path to , , or another bundled tool | | | Print the Swift compiler version | Confirming the toolchain version before building or reporting issues | -------------|------|------| | | List all schemes, targets, and configurations in the project | First thing to run when you're unfamiliar with a project's structure | | | Target a workspace file (CocoaPods, multi-project) | Any project that uses a — always prefer over in this case | | | Target a standalone Xcode project file | Projects that don't use a workspace or CocoaPods | | | Select which scheme to build or test | Required for workspace invocations; pick the app or framework scheme | | | Select a specific target instead of a scheme | Useful when building a single library target without running the full scheme | | | Choose the build configuration | for archives and distribution; for day-to-day builds | --- Building With a scheme selected, compile the app. You can do a full build, a test-only build, or a clean build to wipe stale artifacts. | Command | What | When | |---------|------|------| | | Compile the app for the selected scheme and destination | Verifying the project compiles before running tests | | | Build the test bundle without running tests | CI pipelines that separate the build step from the test execution step | | | Remove all build artifacts for the scheme | Forcing a clean state before an archive build or to fix stale build errors | | | Clean then immediately build | One command to guarantee a fresh compile | | | Specify where to run the build (simulator, device, generic) | Always required for and actions | | | Explicitly set the SDK to build against | Targeting for device builds or for sim | --- Testing Once the code compiles, run your tests. You can run the full suite, split the build and run steps, or target a single test method. | Command | What | When | |---------|------|------| | | Build and run all tests in the scheme | Running the full test suite locally or in CI | | | Run previously built tests without recompiling | CI: second step after , avoids redundant compiles | | | Run a single test target, class, or method | Debugging a specific failing test without running the whole suite | | | Exclude a target, class, or method from the run | Temporarily skipping a flaky test in CI while it is being fixed | | | Use a nam"}]}
Making Sense of Apple’s AI Ecosystem: MLX, HuggingFace, CoreAI
A hype-free explanation of how Apple AI Ecosystem shares a single Swift interface.
Introduction
In my recent blog post, I discussed the Foundation Models framework and how it helps you build intelligent, agentic features on Apple platforms. If you haven’t read that post yet, I’d recommend starting there first before continuing here.
At its core, the Foundation Models framework will act as a frontend orchestrator, thanks to this year’s LanguageModel protocol update 😉. It receives the user’s prompt, decides which instructions to apply, which tools to invoke, and how to stitch the results together to get the best possible output.
But that naturally raises the next question. What exactly is powering the engine underneath?
That’s what this post is about. We’re going one layer deeper, into the models themselves. You’ll learn
how to use LLMs locally with MLX
how MLX helps LLM provider like Anthropic to bring their models to work with Foundation Models APIs
integrate open-source LLM models to Foundation Models framework via Hugging Face(AnyLanguage) and
fine tune via CoreAI
If the Foundation Models framework is the frontend orchestrator, what we’re covering today is the backend, the actual engine that makes your features run.
Hardware Requirements
MLX is purpose-built for Apple Silicon, so the first requirement is simple, you need a Mac with an M-series chip. Intel Macs are not supported.
Beyond that, the real constraint is unified memory. Unlike a traditional GPU setup where you’d need to worry about VRAM separately, Apple Silicon shares one memory pool between the CPU, GPU, and Neural Engine. That’s actually great news for running large models, because the entire pool is available to MLX. The practical implication is quite straightforward, the bigger the model, the more RAM you need.
Here’s a rough guide based on 4-bit quantised model variants (approximate figures, actual requirements vary by model architecture though)
Unified Memory
Models you can run
8 GB
Up to ~3B parameter models (e.g. Llama 3.2 3B 4-bit)
16 GB
Up to ~8B parameter models (e.g. Llama 3.1 8B 4-bit)
32 GB
Up to ~34B parameter models
64 GB+
70B models and beyond
If you’re on M5, there’s a bonus. All Apple Silicon Macs have a Neural Engine, but M5 adds dedicated Neural Accelerators on top of it. MLX targets these automatically for matrix multiplication, the core operation during prompt processing, and the result is a 4x speedup over M4 with zero code changes on your part, cool, right? In fact, MLX selects the best kernel for whatever hardware you’re running on so no need to worry.
For most developers following this blog post, a 16 GB M-series Mac is a comfortable starting point. If you want to experiment with larger frontier-class models, 32 GB or more gives you meaningful headroom without needing aggressive quantisation.
Hugging Face
If you haven’t come across Hugging Face before, think of it as the npm registry for machine learning models. Researchers and teams publish model weights there openly, and anyone can download and use them.
What makes it relevant here is the mlx-community organisation on Hugging Face. This is a community-maintained collection of popular open-source models that have already been converted and quantised for MLX. Models like Llama, Gemma, Qwen, and Mistral are all there in various sizes and quantisation levels, ready to drop straight into mlx-swift-lm by repo ID.
That’s where the model IDs in the code examples throughout this post come from. Whenever you see something like "mlx-community/Llama-3.2-3B-Instruct-4bit", that’s a direct reference to a repository on Hugging Face.
MLX Models Vs SystemLanguageModel
Before we dive into swapping models, it helps to understand what each one actually is 😊.
SystemLanguageModel is Apple’s on-device model, the one Apple Intelligence is built on. It ships with the Foundation Model framework, so you never download weights or manage a model file. Apple rebuilt it this year with stronger reasoning and improved tool calling, added image understanding via prompt attachments, and continues to refine its guardrails. The tradeoff is that get exactly what Apple ships, a locked appliance optimised to run privately within Apple’s defined safety boundaries.
MLX, on the other hand, started life as a numerical computing framework for Apple Silicon. You can imagine this is why I haven’t touched on this framework before, as I’ve never come close to the AI/ML research side of things in my career. Apple designed it for researchers and engineers who wanted to run, explore, and fine-tune arbitrary models on Mac, taking full advantage of the unified memory architecture.
Take note that MLX still lies in the On-Device-AI category. It lets you download the pre-trained model and do the work on your hardware. This is why I have added hardware requirements section.
Before the model can even think about talking to a chat session, it has to know how to calculate matrices on Apple’s Silicon hardware architecture. Open-source models on Hugging Face (like Llama 3 or Qwen) are usually written for Nvidia GPUs using CUDA or standard PyTorch. If you run them raw on a Mac, they don’t know how to efficiently talk to Apple’s Unified Memory or Metal GPU shaders. The core MLX framework is basically Apple’s native version of PyTorch. It rewrites those deep learning operations specifically for M-series chips. It allows us to take an open model, quantize it down (e.g., to 4-bit), and run it natively on Apple’s GPU.
Covering the full MLX library is out of scope here, and frankly, the low-level numerical computing side is well beyond what most app developers need to touch. What matters for us is the layer built on top: MLX-Swift-LM.
MLX from Swift
mlx-swift-lm is a Swift package built on top of MLX that handles the language model layer for you. It ships four library products:
MLXLLM — text-only language models
MLXVLM — vision-language models (for image and text inputs)
MLXEmbedders — text embedding and encoding models
MLXCommon — the shared core: generation logic, KV caching, and base protocols the three above rely on
MLXLM handles the model layer, loading weights, running inference, and managing the KV cache. But notice that none of this involves Foundation Models yet. mlx-swift-lm has its own high-level chat API called ChatSession (from MLXLMCommon), which works entirely independently.
If you’ve used LanguageModelSession before, ChatSession will feel familiar. The mental model is the same, download a model, create a session, send prompts, get responses. Where it differs is in the lower-level control it exposes. GenerateParameters lets you tune things like temperature and maxTokens directly, which Foundation Models abstracts away behind higher-level APIs.
The following are the codes I take from mlx-swift-example repository. You should definitely check out the example projects. They are quite interesting indeed.
Configuring an Open-Source Model
The first step is picking a model. LLMRegistry ships with a set of pre-defined configurations for popular models, analogous to how Foundation Models gives you SystemLanguageModel.default as a ready-to-use starting point.
let modelConfiguration = LLMRegistry.gemma3_1B_qat_4bit
Each entry in LLMRegistry is a ModelConfiguration that wraps a Hugging Face repo ID under the hood. gemma3_1B_qat_4bit, for example, points to mlx-community/gemma-3-1b-it-qat-4bit on Hugging Face. If the model you want isn’t already in the registry, you can define your own configuration directly.
let modelConfiguration = ModelConfiguration(id: "mlx-community/Llama-3.2-3B-Instruct-4bit")
Either way, the rest of the setup stays identical.
Downloading the Model
Once you have a configuration, you load and download the model with #huggingFaceLoadModelContainer
let modelContainer = try await #huggingFaceLoadModelContainer( configuration: LLMRegistry.gemma3_1B_qat_4bit) { progress in // update your UI for loading progress}
#huggingFaceLoadModelContainer is a Swift macro from MLXHuggingFace that handles the full download and caching flow for you. On the first call, it fetches the model weights from Hugging Face. Every subsequent call loads them straight from the local cache without hitting the network. If you want to configure the downloader, tokeniser, and what not, I recommend you to check out their example repository once again.
Downloaded models land in the Hugging Face hub cache on your Mac
~/.cache/huggingface/hub/
Each model gets its own folder named after the repo, for example:
Replace the folder name with whichever model you want to remove. The next time your app runs and requests that model, it will re-download it automatically.
Starting a Chat Session
Once you have the model container, wrap it in a ChatSession to start conversing
let session = ChatSession(modelContainer)let reply = try await session.respond(to: "What is lazy evaluation?")print(reply)
ChatSession automatically maintains conversation history across turns, the same way LanguageModelSession does in Foundation Models. A follow-up question like "Give me a Swift example" will have full context from the previous exchange without you doing anything extra.
You can pass instructions to your chat session directly as a String.
let session = ChatSession( modelContainer, instructions: "You are a concise technical writer.")
You can also change it at any point by mutating session.instructions directly.
Streaming responses
Both APIs support streaming, but the return type differs slightly. Foundation Models streams partial Response values, while ChatSession.streamResponse(to:) yields raw String chunks via AsyncThrowingStream:
for try await chunk in session.streamResponse(to: "Explain value types in Swift.") { print(chunk, terminator: "")}
Each chunk is a fragment of the response as the model generates it, so you can display tokens progressively in your UI.
Tool calling
Foundation Models uses a Tool protocol with structured Swift types. ChatSession takes a lower-level approach. You pass a list of ToolSpec descriptions and a toolDispatch closure that receives the raw ToolCall and returns a String result.
let session = ChatSession( modelContainer, instructions: "Use tools when needed.", tools: [myToolSpec], toolDispatch: { call in // inspect call.name and call.arguments, run your logic, return a result return "Tool result as a plain string" })
This is more manual than Foundation Models’ structured approach, but it gives you full control over how tools are resolved, including async network calls, database lookups, or anything else you can express in a closure.
MLX from Terminal
Everything we’ve covered so far involves writing Swift code. But mlx-lm also ships a Python CLI that lets you download models, chat with them, and run a local server, all without a single line of application code. It’s a great way to test a model before committing it to your app. Apple walked through this exact workflow in Run local agentic AI on the Mac using MLX (WWDC 2026, session 232), which is worth watching if you want to go deeper. It is quite impressive that an on-device model created a SwiftUI drawing app from scratch, though, I don’t know the exact spec of his machine and how long does it actually take.
Install mlx-lm command
pip install mlx-lm
That one command gets you the full CLI toolkit. If your machine doesn’t have python, be sure to download that first so that you get access to pip command.
Chat directly in the terminal
To have a quick one-shot conversation with any mlx-community model
mlx_lm.generate \
  --model mlx-community/Llama-3.2-3B-Instruct-4bit \
  --prompt "Explain value semantics in Swift in two sentences."
For an interactive multi-turn session, use mlx_lm.chat instead
The model downloads automatically on first run into ~/.cache/huggingface/hub/, the same cache location as the Swift package, so switching between the CLI and your app costs nothing extra.
Run a local server
The more powerful option is spinning up a local server that any agent or tool can talk to.
Take note that the /v1/chat/completions path is not something you configure, it is hardcoded because it mirrors the exact endpoint path OpenAI defined for their API. This is the same HTTP API that OpenAI defined for ChatGPT, and it became a de facto standard that the whole AI tooling ecosystem adopted. When a tool says it is “OpenAI-compatible”, it means it speaks that same protocol, so any client, agent, or IDE integration built to talk to OpenAI can be pointed at a different base URL and work without modification. In this case, that base URL is your own Mac. From that point, anything that speaks the protocol can use your local model, including OpenCode, Xcode, custom scripts, or even a plain curl
OpenCode has no idea the model is running on your Mac rather than a cloud endpoint. Every request goes through your local server, so apparently no API key, no usage cost, and fully private.
Connecting with Xcode
If you want Xcode 27’s built-in Intelligence features to use your local model, open Settings, Intelligence, Add Chat Provider, select “Locally Hosted”, and set the port to 8080. Xcode will route its model requests to your running MLX server from that point on.
Going beyond localhost with MacProvider
mlx_lm.server only listens on your Mac. If you want your MLX endpoint reachable from other machines or devices without managing tunnels yourself, MacProvider is a 3rd party built thin layer over mlx-lm that handles that gap. I haven’t tried it out for myself yet, but, it looks quite nice so I want to share with you all here.
If I understand the idea correctly, you install a small CLI agent on your Mac, which connects outbound over WebSocket to a coordinator. No port-forwarding or firewall changes needed on your end. From the buyer side, you get a standard OpenAI-compatible endpoint at api.streamvc.live/v1 and can swap it into any existing client.
One thing worth knowing is that prompts and responses pass through the gateway for routing and billing. Model weights stay on the provider’s Mac and never leave, but this is not a private-inference guarantee. The README is upfront about this, so go in with eyes open if your use case is sensitive.
MLX for LLM Providers
Everything in this section is theoretical on my part. I am not a model provider, and I have not implemented any of this myself. What follows is my reading of Apple’s WWDC 2026 session Bring an LLM provider to the Foundation Models framework, which walks through exactly how providers are expected to integrate. If you are building a provider package, that session is the authoritative source, not this post.
This year, Apple opened the Foundation Models abstraction layer to third-party providers. Anthropic and Google are both shipping Swift packages that bring Claude and Gemini into LanguageModelSession through the same LanguageModel protocol that SystemLanguageModel uses. From your app code, the swap looks identical to switching between any other model.
What makes this interesting is what happens underneath. A provider package is no longer an HTTP client wrapper. It is a full integration layer that has to bridge the provider’s own model behaviour, safety guardrails, and capabilities into Apple’s framework contracts. Here is how that works at a high level.
The two protocols
Every provider implementation revolves around two protocols: LanguageModel and LanguageModelExecutor.
LanguageModel is the lightweight, value-typed description of the model. It declares what the model can do by listing its capabilities, such as tool calling, guided generation, and reasoning. It also provides an executorConfiguration, which acts as the cache key for the executor instance inside a session.
LanguageModelExecutor is where the actual work happens. It initialises with the configuration, optionally prewarms (loading weights or opening a connection), and then handles each generation request by translating the Foundation Models Transcript into the provider’s native wire format, making the call, and streaming the response back through a typed channel.
public protocol LanguageModel: Sendable { var capabilities: LanguageModelCapabilities { get } var executorConfiguration: Executor.Configuration { get }}public protocol LanguageModelExecutor: Sendable { init(configuration: Configuration) throws func prewarm(model: Model, transcript: Transcript) func respond( to request: LanguageModelExecutorGenerationRequest, model: Model, streamingInto channel: LanguageModelExecutorGenerationChannel ) async throws}
Translating the transcript
The executor receives the full conversation as a Transcript, which contains typed entries: instructions, user prompts, tool calls, tool outputs, model responses, and reasoning. The provider’s job is to map these entries to whatever role format their API expects (system, user, assistant, tool, and so on) and then apply any context and generation options the developer passed.
This is where a provider’s safety layer lives. Anthropic’s executor, for example, would forward the assembled prompt to the Claude API, which applies Anthropic’s own constitutional AI guardrails server-side. The response comes back and the executor streams it into the channel. Apple’s framework never sees or touches the safety logic directly. It just receives the streamed tokens.
Streaming the response
Responses are always streamed, even when the developer calls the one-shot respond(to:) API. The recommended order is metadata first, then token usage, then text deltas:
// 1. Send identifying metadata early for loggingawait channel.send(.response(action: .updateMetadata([ "modelID": "claude-opus-4-8", "requestID": request.id.uuidString])))// 2. Report prompt token usage before generationawait channel.send(.response(action: .updateUsage( input: .init(totalTokenCount: promptTokens, cachedTokenCount: cachedTokens), output: .init(totalTokenCount: 0, reasoningTokenCount: 0))))// 3. Stream generated tokens as they arrivefor try await token in responseStream { await channel.send(.response(action: .appendText(token)))}
Authentication and security
Because these are server-backed models, the provider package has to handle authentication. Apple’s guidance is to use OAuth flows rather than raw API keys, store tokens in Keychain, and consider App Attest for device verification. The upside of this design is that app developers never manage API keys directly; the provider package handles the full credential lifecycle.
This is fundamentally different from the on-device models. With SystemLanguageModel or open-source MLX models, nothing leaves your device. With Claude or Gemini behind this protocol, every request goes to Anthropic’s or Google’s servers, with the same privacy characteristics as calling their APIs directly. The LanguageModel protocol makes the call site identical, and hence the effortless model swapping, but the data flow under the hood is not.
Use Hugging Face Models via AnyLanguageModel
mlx-swift-lm is great for raw inference and experimentation. But it operates independently of Foundation Models, which means you lose all the agentic primitives: DynamicProfile, structured output via @Generable, the instruction system, tool orchestration, and everything else built on top. Building those yourself from scratch in MLX is sort of re-inventing the wheel.
If you want open-source models inside your existing Foundation Models code, AnyLanguageModel from Hugging Face is the best option. Of course, it is still using MLX under the hood. Thanks to LanguageModel abstraction, and wrapper ecosystems like AnyLanguageModel, MLX has become an invisible implementation detail for consumers like yourself.
AnyLanguageModel is a drop-in replacement for the Foundation Models framework. It supports a wide range of backends: Apple’s own models, MLX, Core ML, llama.cpp (GGUF), Ollama, and even cloud providers like Anthropic, Google Gemini, and OpenAI. The entire switch only takes one line
That’s it. Every LanguageModelSession, every Tool, every Instructions block you already wrote continues to work. You just gain the ability to back it with a different model.
Installation
You can install the package via SPM
// Package.swiftdependencies: [ .package( url: "https://github.com/huggingface/AnyLanguageModel", exact: "0.8.0", traits: ["MLX"] // opt into the MLX backend ), // Required: add the underlying dep directly (SPM trait bug workaround) .package(url: "https://github.com/ml-explore/mlx-swift-lm", exact: "2.25.5"),]
AnyLanguageModel uses Swift 6.1 package traits to keep binary size small. You opt in with "MLX", "CoreML", or "Llama" as needed, and add the underlying dependency alongside it due to a known SPM bug. For this article, we will pass MLX as a trait.
This tells the package to quietly install mlx-swift-lm under the hood. If you changed that trait to “Llama”, the wrapper would swap out MLX completely and use llama.cpp (GGUF format) to execute the model instead, without changing a single line of your actual generation code.
If you want to know more about Swift Package Trait, I have another blog post for you 😉.
Xcode projects: Xcode doesn’t support package traits directly yet. The workaround is to create a local Swift package shim that re-exports AnyLanguageModel with the traits enabled, then add that local package to your Xcode project. The AnyLanguageModel README has a step-by-step guide for this.
Using an MLX model inside Foundation Models
Once the package is added, swap SystemLanguageModel.default for an MLX model and the rest of your code is unchanged:
import AnyLanguageModel// Use any mlx-community model by Hugging Face repo IDlet model = MLXLanguageModel(modelId: "mlx-community/Llama-3.2-3B-Instruct-4bit")let session = LanguageModelSession(model: model)// Tools, instructions, streaming — all the same Foundation Models APIslet response = try await session.respond(to: "What is lazy evaluation?")print(response.content)
This is all it takes to bridge between the two worlds. You get the full model flexibility of the mlx-community on Hugging Face, and you keep every Foundation Models primitive you’ve already built on top.
Decoding the Model Name
If you’re not from an AI/ML background, model identifiers like mlx-community/Llama-3.2-3B-Instruct-4bit look like random noise at first glance. They’re not. Each segment tells you something specific, and once you know the pattern, picking a model becomes straightforward.
(1) Model family — The architecture name, like Llama, Gemma, Qwen, or Mistral. Think of this like a framework name such as SwiftUI vs UIKit vs CoreGraphics etc. Different teams, different design decisions, different trade-offs.
(2) Version — The release iteration of that family. 3.2 is a newer, generally better version than 3.1 from the same family, much like a library version.
(3) Parameter count — 3B means 3 billion parameters. Parameters are the learned numerical weights that define how the model thinks. More parameters generally means a smarter, more capable model, but also more memory and slower inference.
(4) Fine-tuning flavour — This is the most important one to get the right model. Let’s try to break it down.
Base (or Pre-trained): Trained purely to predict the next token in a sequence. Ask it “How do I bake a cake?” and it might respond with more questions like “How do I bake bread? How do I make cookies?” It’s not trying to help you, it’s just completing a pattern. Useful for further fine-tuning, not for shipping to users.
Instruct (or Chat): Further trained with human feedback to behave like an assistant. It knows it should give you a direct, helpful answer. Always use Instruct or Chat variants for app features.
(5) Quantisation — The compression level applied to the weights. 4bit means each parameter is stored using 4 bits instead of the full 16 or 32 bits. This drastically reduces the model’s memory footprint so it can run on-device, at the cost of a small accuracy trade-off. According to my experience, 4bit is the sweet spot for most use cases, it fits in reasonable RAM and the quality degradation is barely noticeable in practice. 8bit is higher quality with more memory. 2bit is very compressed and noticeably worse.
Choosing the Right Model
Honestly, this is an area I’m still experimenting with myself, so take this as a working guide rather than a definitive rulebook. That said, there are three things worth checking before you commit to a model: memory fit, task complexity, and the context window.
Memory fit first
This one is non-negotiable. Apple Silicon uses unified memory, so the model, your app, and the OS all share the same pool. If a model is too large to fit, macOS starts paging weights to the SSD, and inference slows to a crawl. Not a graceful degradation, just very slow.
A rough formula to estimate how much memory a model needs:
Memory (GB)≈8Parameters (B)×Bit-depth+1
With above formula in mind, try to plug in some real examples:
Model
Parameters
Quantisation
Estimated RAM
Gemma 3 1B
1B
4-bit
~1.5 GB
Llama 3.2 3B
3B
4-bit
~2.5 GB
Llama 3.1 8B
8B
4-bit
~5 GB
Mistral 34B
34B
4-bit
~18 GB
Add another ~1-2 GB headroom for the KV cache during generation, especially for longer conversations. So on a 16 GB machine, an 8B parameters, each parameter stored as 4-bit model is comfortable. A 34B model needs 32 GB or more to avoid paging.
Task complexity
Bigger is not always better, especially when load time and memory cost are real constraints on a device. A 1B-3B model handles summarisation, classification, short Q&A, and simple text transformations surprisingly well. For multi-step reasoning, code generation, or anything that requires holding a lot of context in mind at once, you start to feel the ceiling around 3B and a 7B-8B model becomes noticeably better. Beyond 8B, you’re mostly trading memory for marginal quality gains on typical app tasks.
Here is a rough starting point so you know how it looks
1B-3B — lightweight tasks: classification, short Q&A, simple rewrites
34B+ — research-grade tasks where quality matters more than resource cost
Context window
The context window is the maximum number of tokens a model can hold in one go, covering your system prompt, conversation history, and the pending response all at once. Most MLX models in the 1B-8B range support 4K-8K tokens. Newer releases of Llama and Qwen push to 32K or 128K.
For most app features this doesn’t matter much. Short chat turns, single-pass generation, and tool calling fit comfortably in 4K. Where it starts to matter is long document summarisation or multi-turn conversations that carry a lot of history. In those cases, check the model card on Hugging Face before committing. If your use case involves processing large inputs, a smaller model with a 32K window can apparently beat a larger model with a 4K window.
When in doubt, start with a 3B or 7B Instruct model, measure quality on your actual task, and only go larger if the output noticeably falls short. At least, that is my plan right now.
Core AI
When I first saw “CoreAI” mentioned alongside Foundation Models, I assumed it was purely a fine-tuning story. It is much broader than that. Core AI is Apple’s on-device inference stack, the same engine that powers Apple Intelligence internally, now opened up to developers. I bet it is going to be a successor to Core ML, in a way, as it rebuilt from the ground up for the generative AI era. Fine-tuning and model compression are part of the toolchain, but for most app developers the relevant story is inference, bringing your own model onto the device and running it efficiently.
Where Core ML spoke in .mlmodel files and focused on classification and traditional ML workloads, Core AI speaks in .aimodel files and is designed for modern transformer-based models. It can run across the CPU, GPU, and Neural Engine, and has first-class support for stateful workloads like autoregressive text generation, where the model needs to carry forward a KV cache between each output token. The framework covers the full lifecycle, Python tooling for conversion and compression, Xcode integration for inspection and profiling, and Swift APIs for running inference on-device.
Converting a Model
Core AI’s Python tooling (coreai_torch) handles the trip from a PyTorch model to a .aimodel asset. There is a separate tool, coreai_opt, for model compression and quantisation if you need to shrink the model further before deployment. If you’re converting your own PyTorch model from scratch, you may use coreai_torch library. I won’t be covering this in the article as it is not my best interest at the moment.
If you want to try out, Apple publishes the Core AI Models repository, which has ready-made export recipes for popular models like SAM3 and Qwen. Instead of figuring out the export flags yourself, you run their provided recipe and get an optimized .aimodel out the other side. This is the practical path for me.
Once you have the .aimodel file, you can open it directly in Xcode to inspect its function signatures, tensor shapes, and memory footprint before touching a line of Swift.
Loading and Running in Swift
The Swift side of Core AI is built around three types: AIModel, InferenceFunction, and NDArray.
import CoreAIlet model = try await AIModel(contentsOf: modelURL)let mainFunction = try model.loadFunction(named: "main")! // "main" is the function name you assigned during exportlet input = NDArray(shape: [1, 128], scalarType: .float32)var outputs = try await mainFunction.run(inputs: ["input": input])let result = outputs.remove("output")?.ndArray
This is the low-level API, and it mirrors Core ML’s MLModel pattern fairly closely. You’re responsible for preparing your input tensors and interpreting the output tensors. For custom models where you control the architecture, this is exactly the right level of abstraction.
But for language models specifically, the Core AI Models Swift package wraps all the tokenizer setup and tensor handling for you, and gives you a Foundation Models integration out of the box.
Plugging into Foundation Models
This is the part that makes Core AI genuinely interesting from an app developer’s perspective. The Core AI Models package ships a CoreAILanguageModel type that conforms to Apple’s LanguageModel protocol. You load a Qwen model or any other Core AI language model and pass it straight into LanguageModelSession.
Because it conforms to LanguageModel, everything you’ve already built with Foundation Models still works. Structured generation with @Generable, tool calling, streaming, instructions, all of it carries over unchanged. The model backing the session just happens to be your custom .aimodel running entirely on-device instead of Apple’s system model.
@Generablestruct VocabCard { let word: String let translation: String let exampleSentences: [String]}let response = try await session.respond( to: "Create a vocab card for the word 'bloom'.", generating: VocabCard.self)let card: VocabCard = response.content
This is the same @Generable pattern you’d use with SystemLanguageModel.default. Nothing changes in how you write the feature code.
The Specialisation Delay
The first time a Core AI model runs on a user’s device, it has to be specialised. Specialisation is a compilation step that tailors the model for the exact chip and OS version on that specific device. It can take a noticeable amount of time for larger models, and if it happens in the middle of an interactive flow, the user just sees your app stall.
The Apple’s recommended approach, obviously, is to just treat this step like a download. Do it deliberately, outside the user’s primary action.
Gate the feature behind an explicit opt-in
Download the .aimodel asset via Background Assets after the user opts in
Trigger specialisation during a first-run experience with clear progress feedback
On subsequent launches, the device cache makes loading fast
Apple provides AIModelCache and explicit specialisation APIs so you can check whether a model is ready and request preparation ahead of time. For the full API details, the Managing model specialisation and caching documentation page is the right starting point.
Apple’s AI ecosystem has a lot of moving parts, and I hope this post made it a little less overwhelming. The good news is that once you see how LanguageModel acts as the common thread, everything else starts to fall into place naturally.
Thanks for sticking around to the end. It’s a long one, I know. If you found it useful, or if something here is wrong, I’d love to hear from you 😊.
Found this useful?
Share it with someone who'd find it valuable — and if you want more like this, subscribe to get new posts straight to your inbox.
Comments are powered by Giscus (GitHub Discussions). Loading them fetches resources from GitHub.
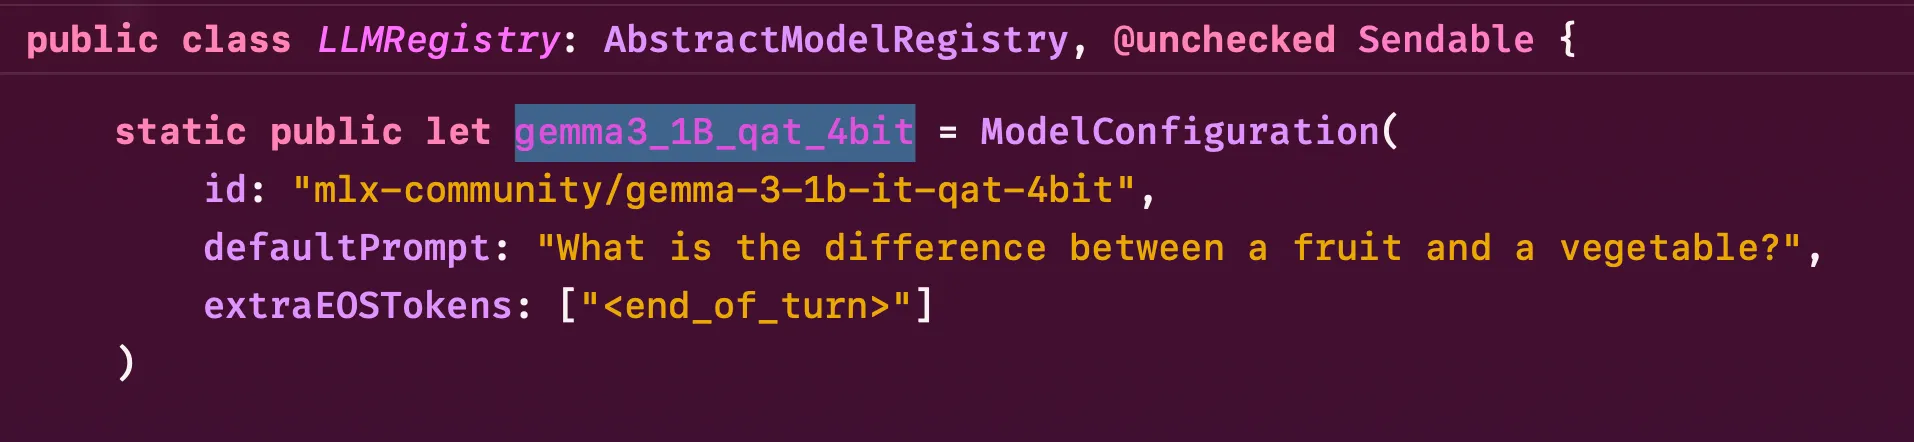
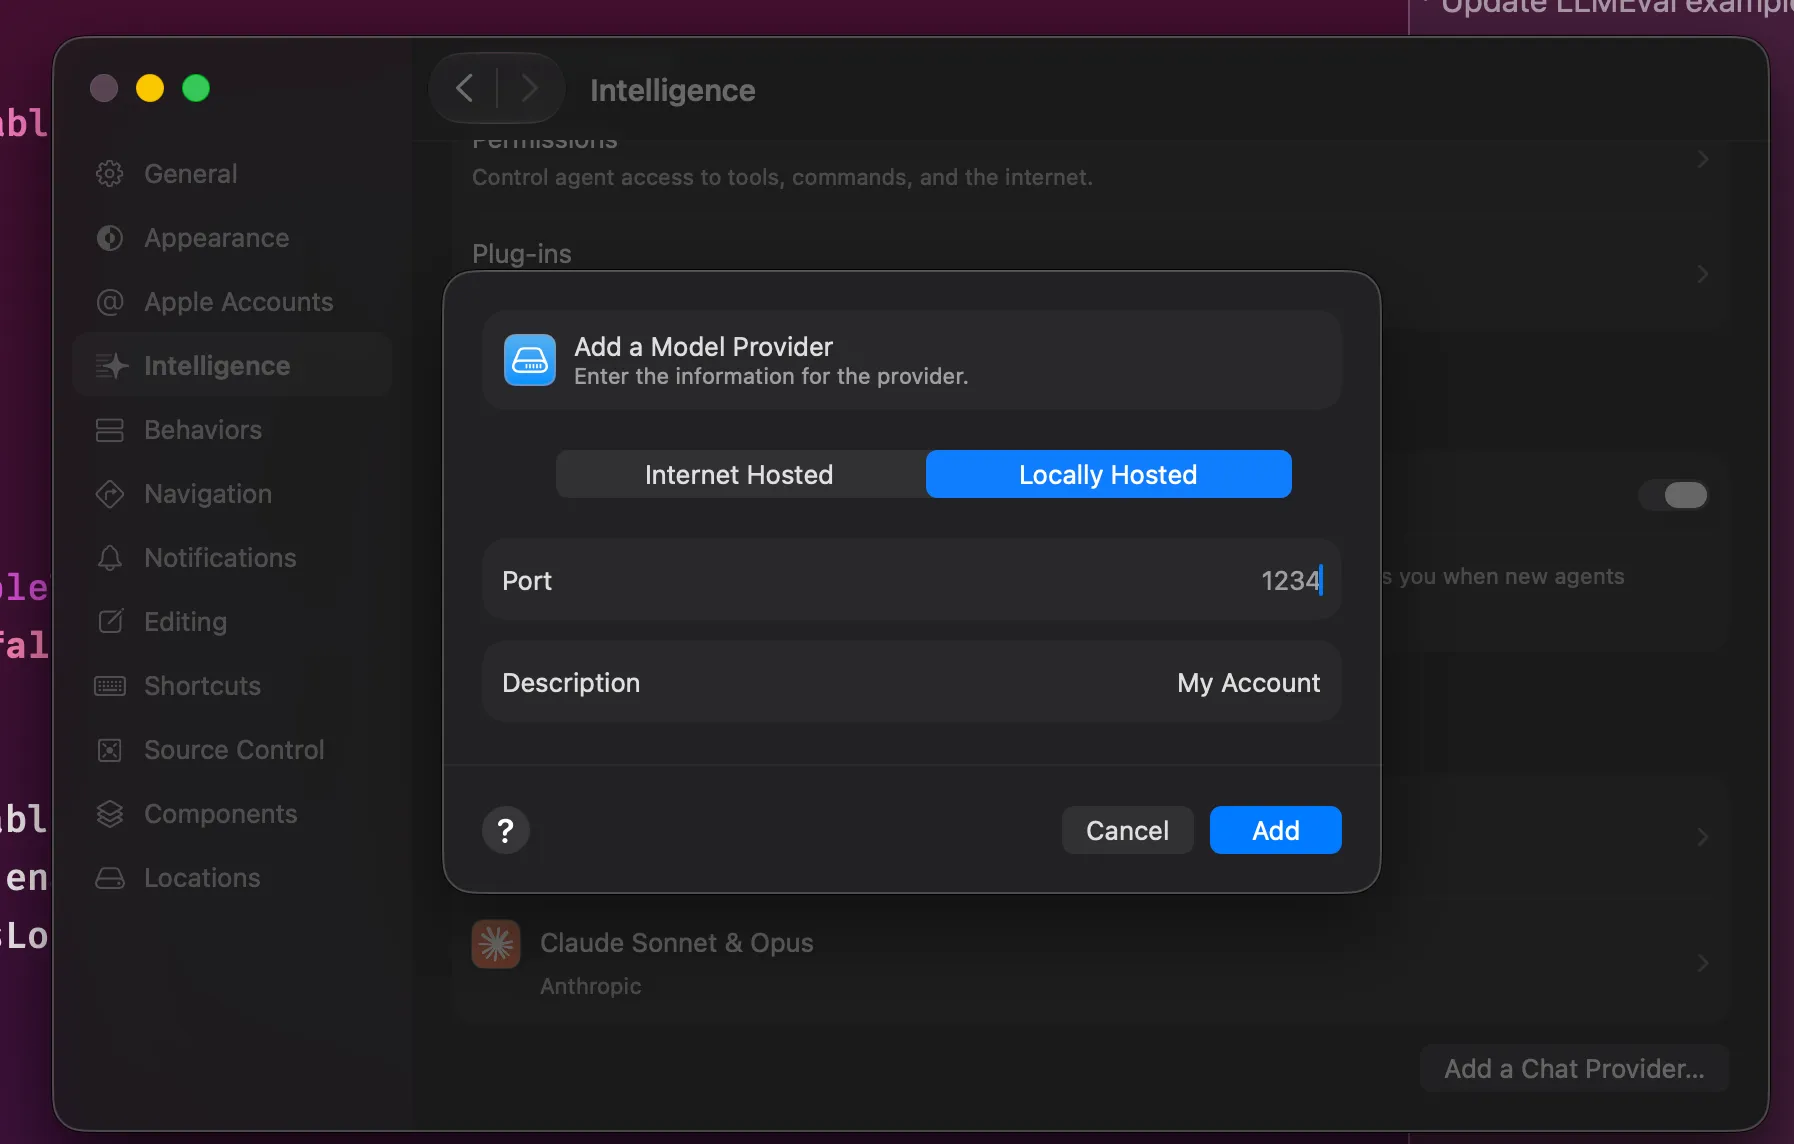
Comments are powered by Giscus (GitHub Discussions). Loading them fetches resources from GitHub.